


If long days of sitting leave your hips stiff and your low back aching, Supported Pigeon Pose may become your go-to shape. It gently stretches the hip flexors, hip rotators and the muscles at the back and outer side of the hip, including the piriformis, a small muscle deep in the hip that sits close to the sciatic nerve.
Whether we have hip or low back pain, or even sciatica from a tight piriformis, traditional pigeon pose can feel intense. When you ease into the posture slowly and let a support hold the weight of your upper body, your muscles have the support they need to soften and let go.
Adding support, such as a bolster or blankets, turns the pose into a restorative practice. The props take on your weight, so your joints carry less strain and your nervous system has room to settle.
I’m Cyndi Roberts, a certified yoga therapist (C-IAYT), and I have lived with low back pain myself since 2001. For me, a regular home practice of gentle stretching has been key to easing low back tension, increasing hip mobility and supporting better sleep, posture and emotional resilience. This is why I often share this pose with private clients who are looking for relief. The stretch may still feel strong, so go slowly and let your body release at its own pace.
If your hips feel tight or getting down to the floor isn’t comfortable right now, you are welcome to begin with Reclined Pigeon Pose instead. Rest on your back with the earth supporting you, and breathe slowly as you choose how deep the stretch goes. Every body arrives with its own history, and Reclined Pigeon is a kind and wise place to start. As your hips open over time, it can become your path toward Supported Pigeon. You’ll find the steps in the FAQ below.
A note for your knees: the front knee is deeply bent in Supported Pigeon, and when the hip is tight, the knee can take strain it shouldn’t. If you have knee pain, a knee injury, a knee replacement or recent knee surgery, start with Reclined Pigeon instead. Whatever your history, come out of the pose right away if you feel pain in the knee itself.
If you’ve had a hip replacement, check with your doctor before trying this pose.
In this post: What you’ll need · When to back off · How to set up · Prop options · Benefits · FAQ
What you’ll need
- A bolster, folded blankets or towels. A firm, rectangular bolster gives your torso a steady place to rest, but folded blankets, towels or firm bed or couch pillows also work.
- Two or three blankets. One rolls up to go under your hips, and the others can stack on the bolster if you need more height.
- A yoga block. It props one end of the bolster higher when the fold feels like too much.
- A mat or soft padding on the floor.
When to back off and when to see a doctor
A strong stretch in the hip is normal. Pain is a different signal, and it’s your body asking you to ease up.
Come out of the pose or add more support if you feel:
- Pain in the front knee. Bring the front heel closer to your groin.
- Tingling, numbness, burning or sharp, electric pain anywhere in the leg.
- Pinching in the front of the hip or the groin.
- Your breath turning tight, shallow or held.
Talk with your doctor before continuing if you have tingling, numbness or electric pain that runs down the length of your leg, or pain in your mid to low back that doesn’t ease with rest. These can be signs of a disc issue, which needs a medical evaluation. Check with your doctor as well if you’ve had a hip or knee replacement or a recent injury.
How to set up Supported Pigeon Pose
- Come onto hands and knees in Table Pose. Place the bolster lengthwise on the floor in front of you, with your blankets and block within reach.
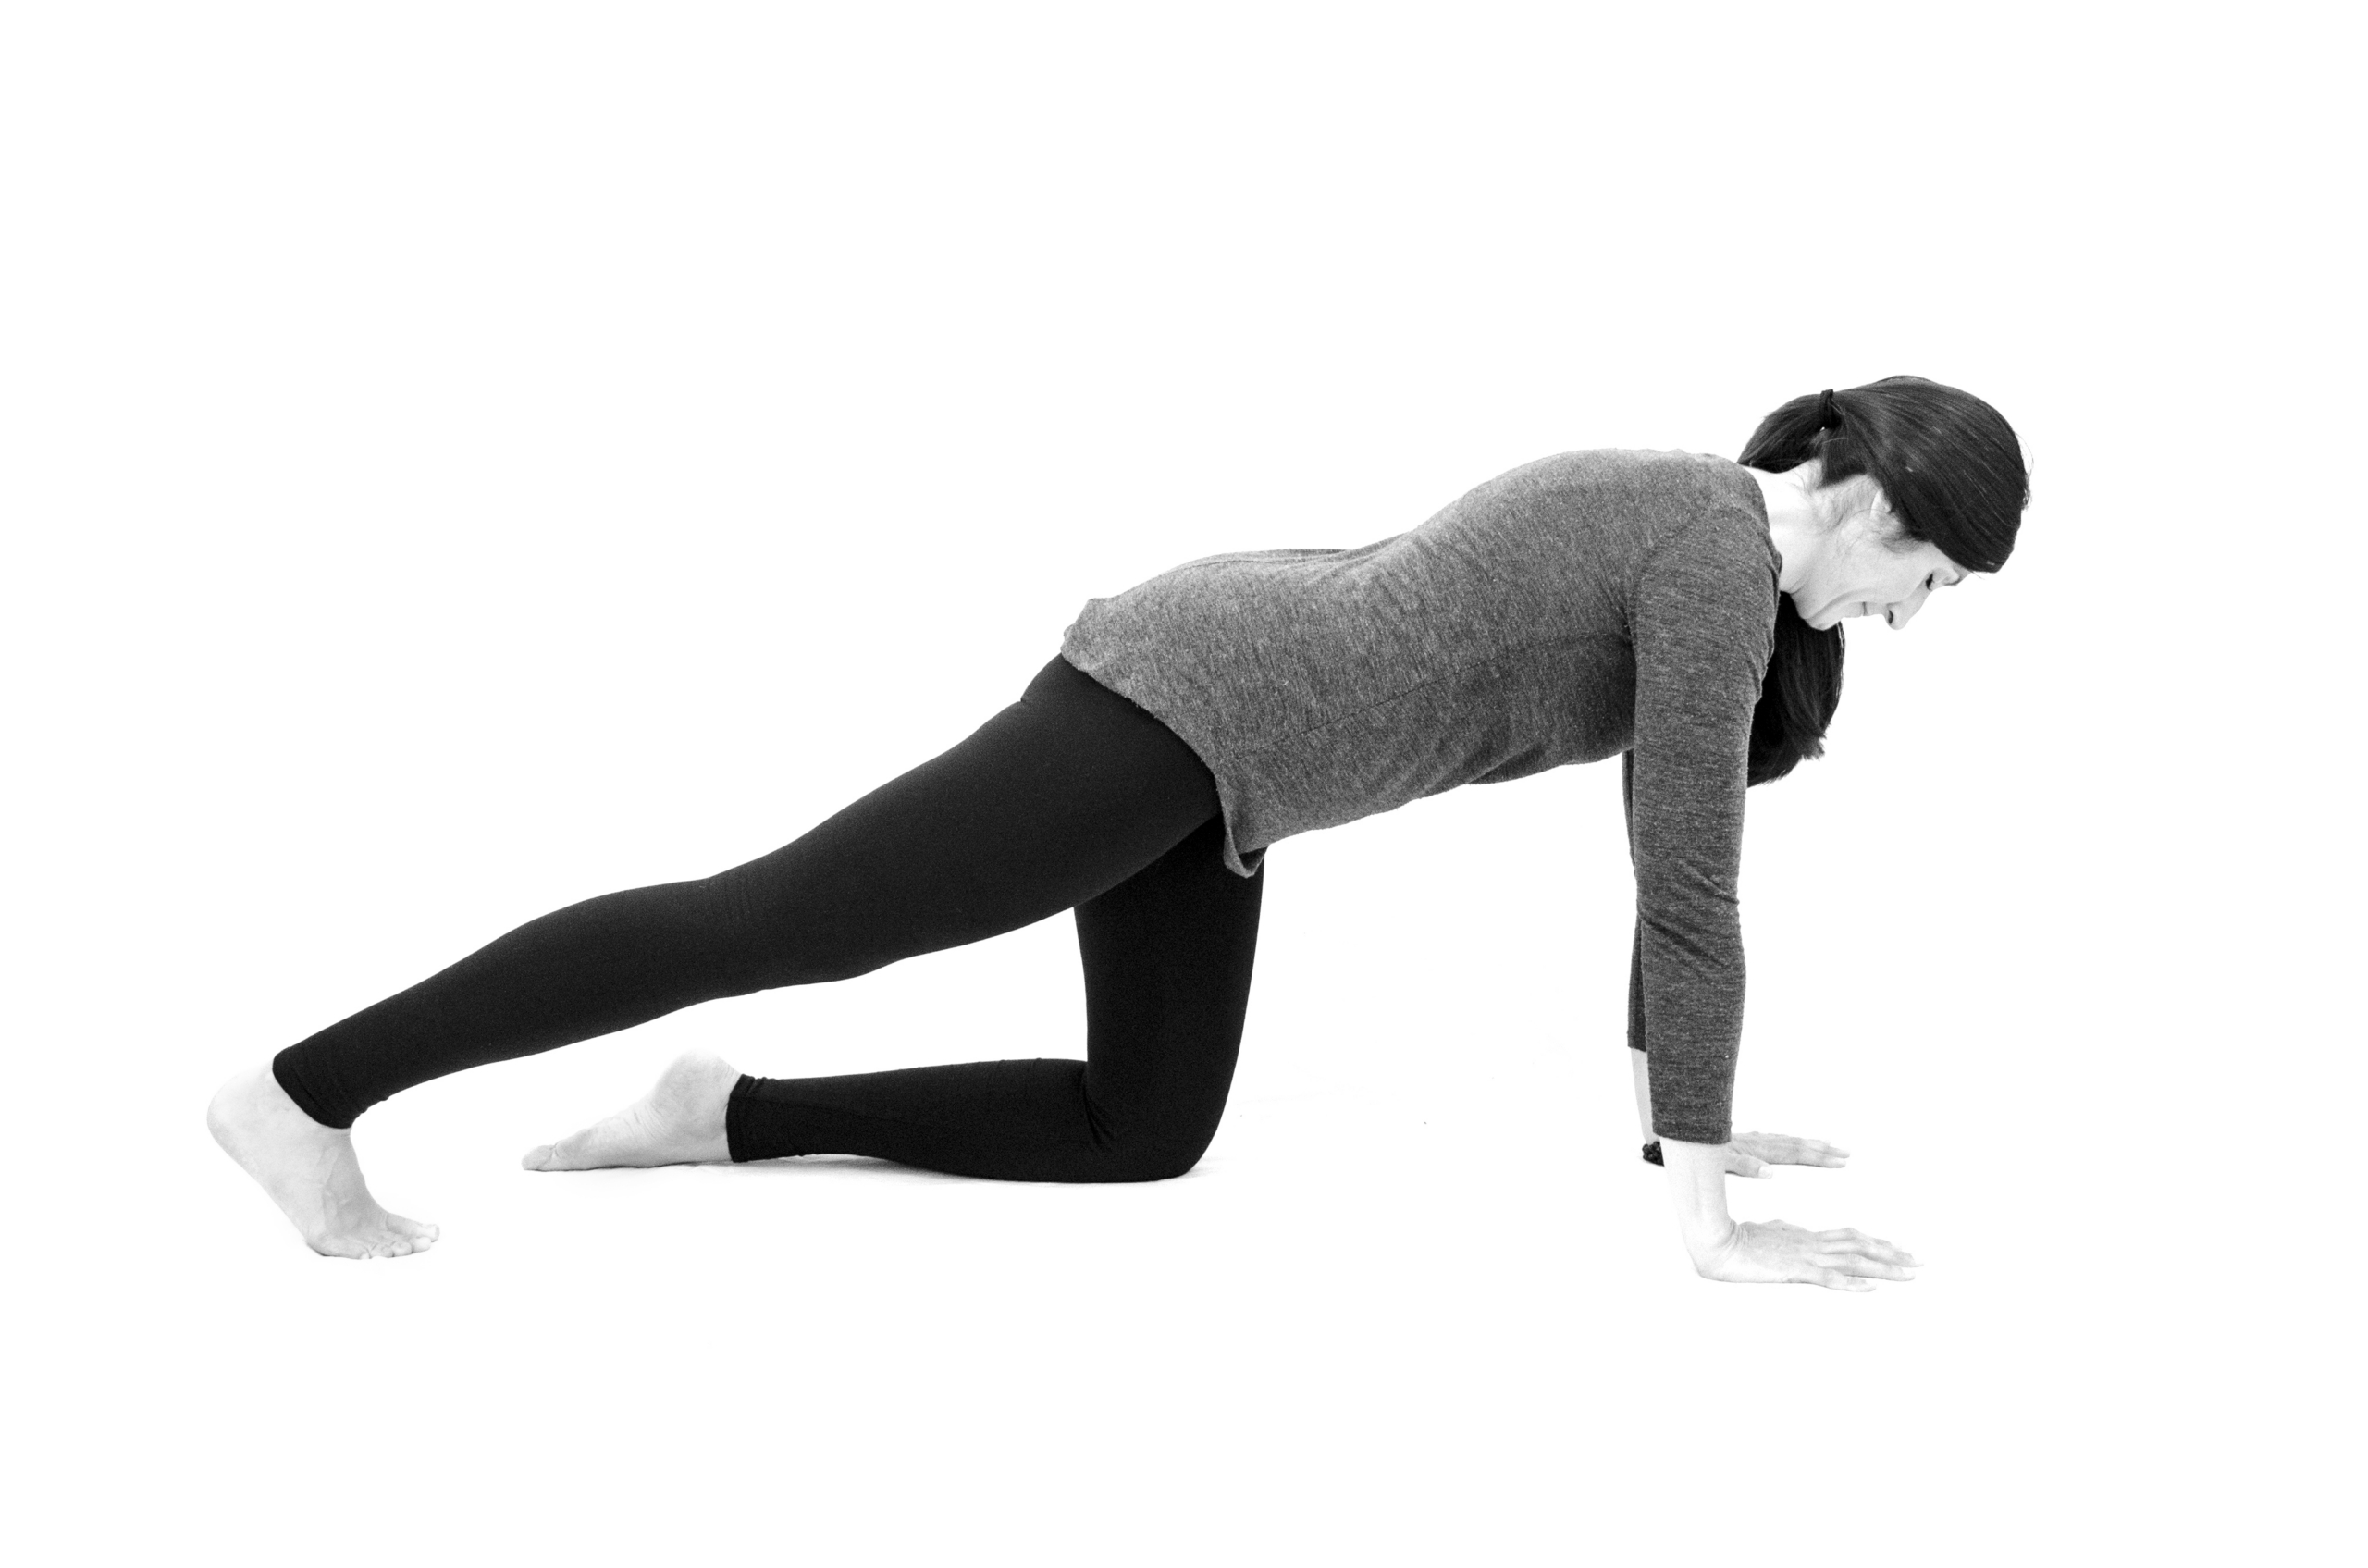
- Draw the right knee forward toward the right wrist. Let the right foot slide over toward the left as you lengthen the left leg straight back behind you.
- Stay up on the hands for a moment and rest the top of the back foot on the floor. Shift your weight until your hips feel level and centered.
- Adjust the intensity with the front foot. Keeping the right heel close to the groin makes the stretch gentler, and moving the foot farther forward makes it deeper.
- Slide a blanket roll under both hips. This keeps the pelvis even and gives the hips a place to settle.
- Inhale, lengthen and lift the waist away from the hips. As you exhale, fold forward and rest the torso on the bolster.
- Turn the head toward the bent knee. Rest the forearms and hands on the earth and let the shoulders soften.
- Let the bolster hold you. If the chest doesn’t reach it comfortably, stack folded blankets on top or prop the far end on a block.
- If you’re new to the pose, 2 or 3 minutes is a good place to start. With more practice, try 4 to 6 minutes.
As you settle in, slow the breath and rest into the first place of resistance. Find a stretch you can breathe into and relax with. Notice what feels like too much and what feels like too little. If you find yourself gripping or holding your breath, come up and add more height under your torso or try it reclined and work your way to this posture.
Coming out and switching sides
- Press into the hands and slowly lift the torso. Come back to Table Pose on hands and knees.
- Stretch the bent front leg back behind you and press through the heel, or lift into Downward Facing Dog and gently bend one knee and then the other. Alternate between legs if you like.
- When the legs feel open, return to Table Pose and set up on the left side.
- After the second side, finish with a few slow breaths in Child’s Pose or lying on your back.
Four ways to prop the pose
Every body needs a slightly different setup, and your needs may change from one day to the next. Try these in order, from the least support to the most.
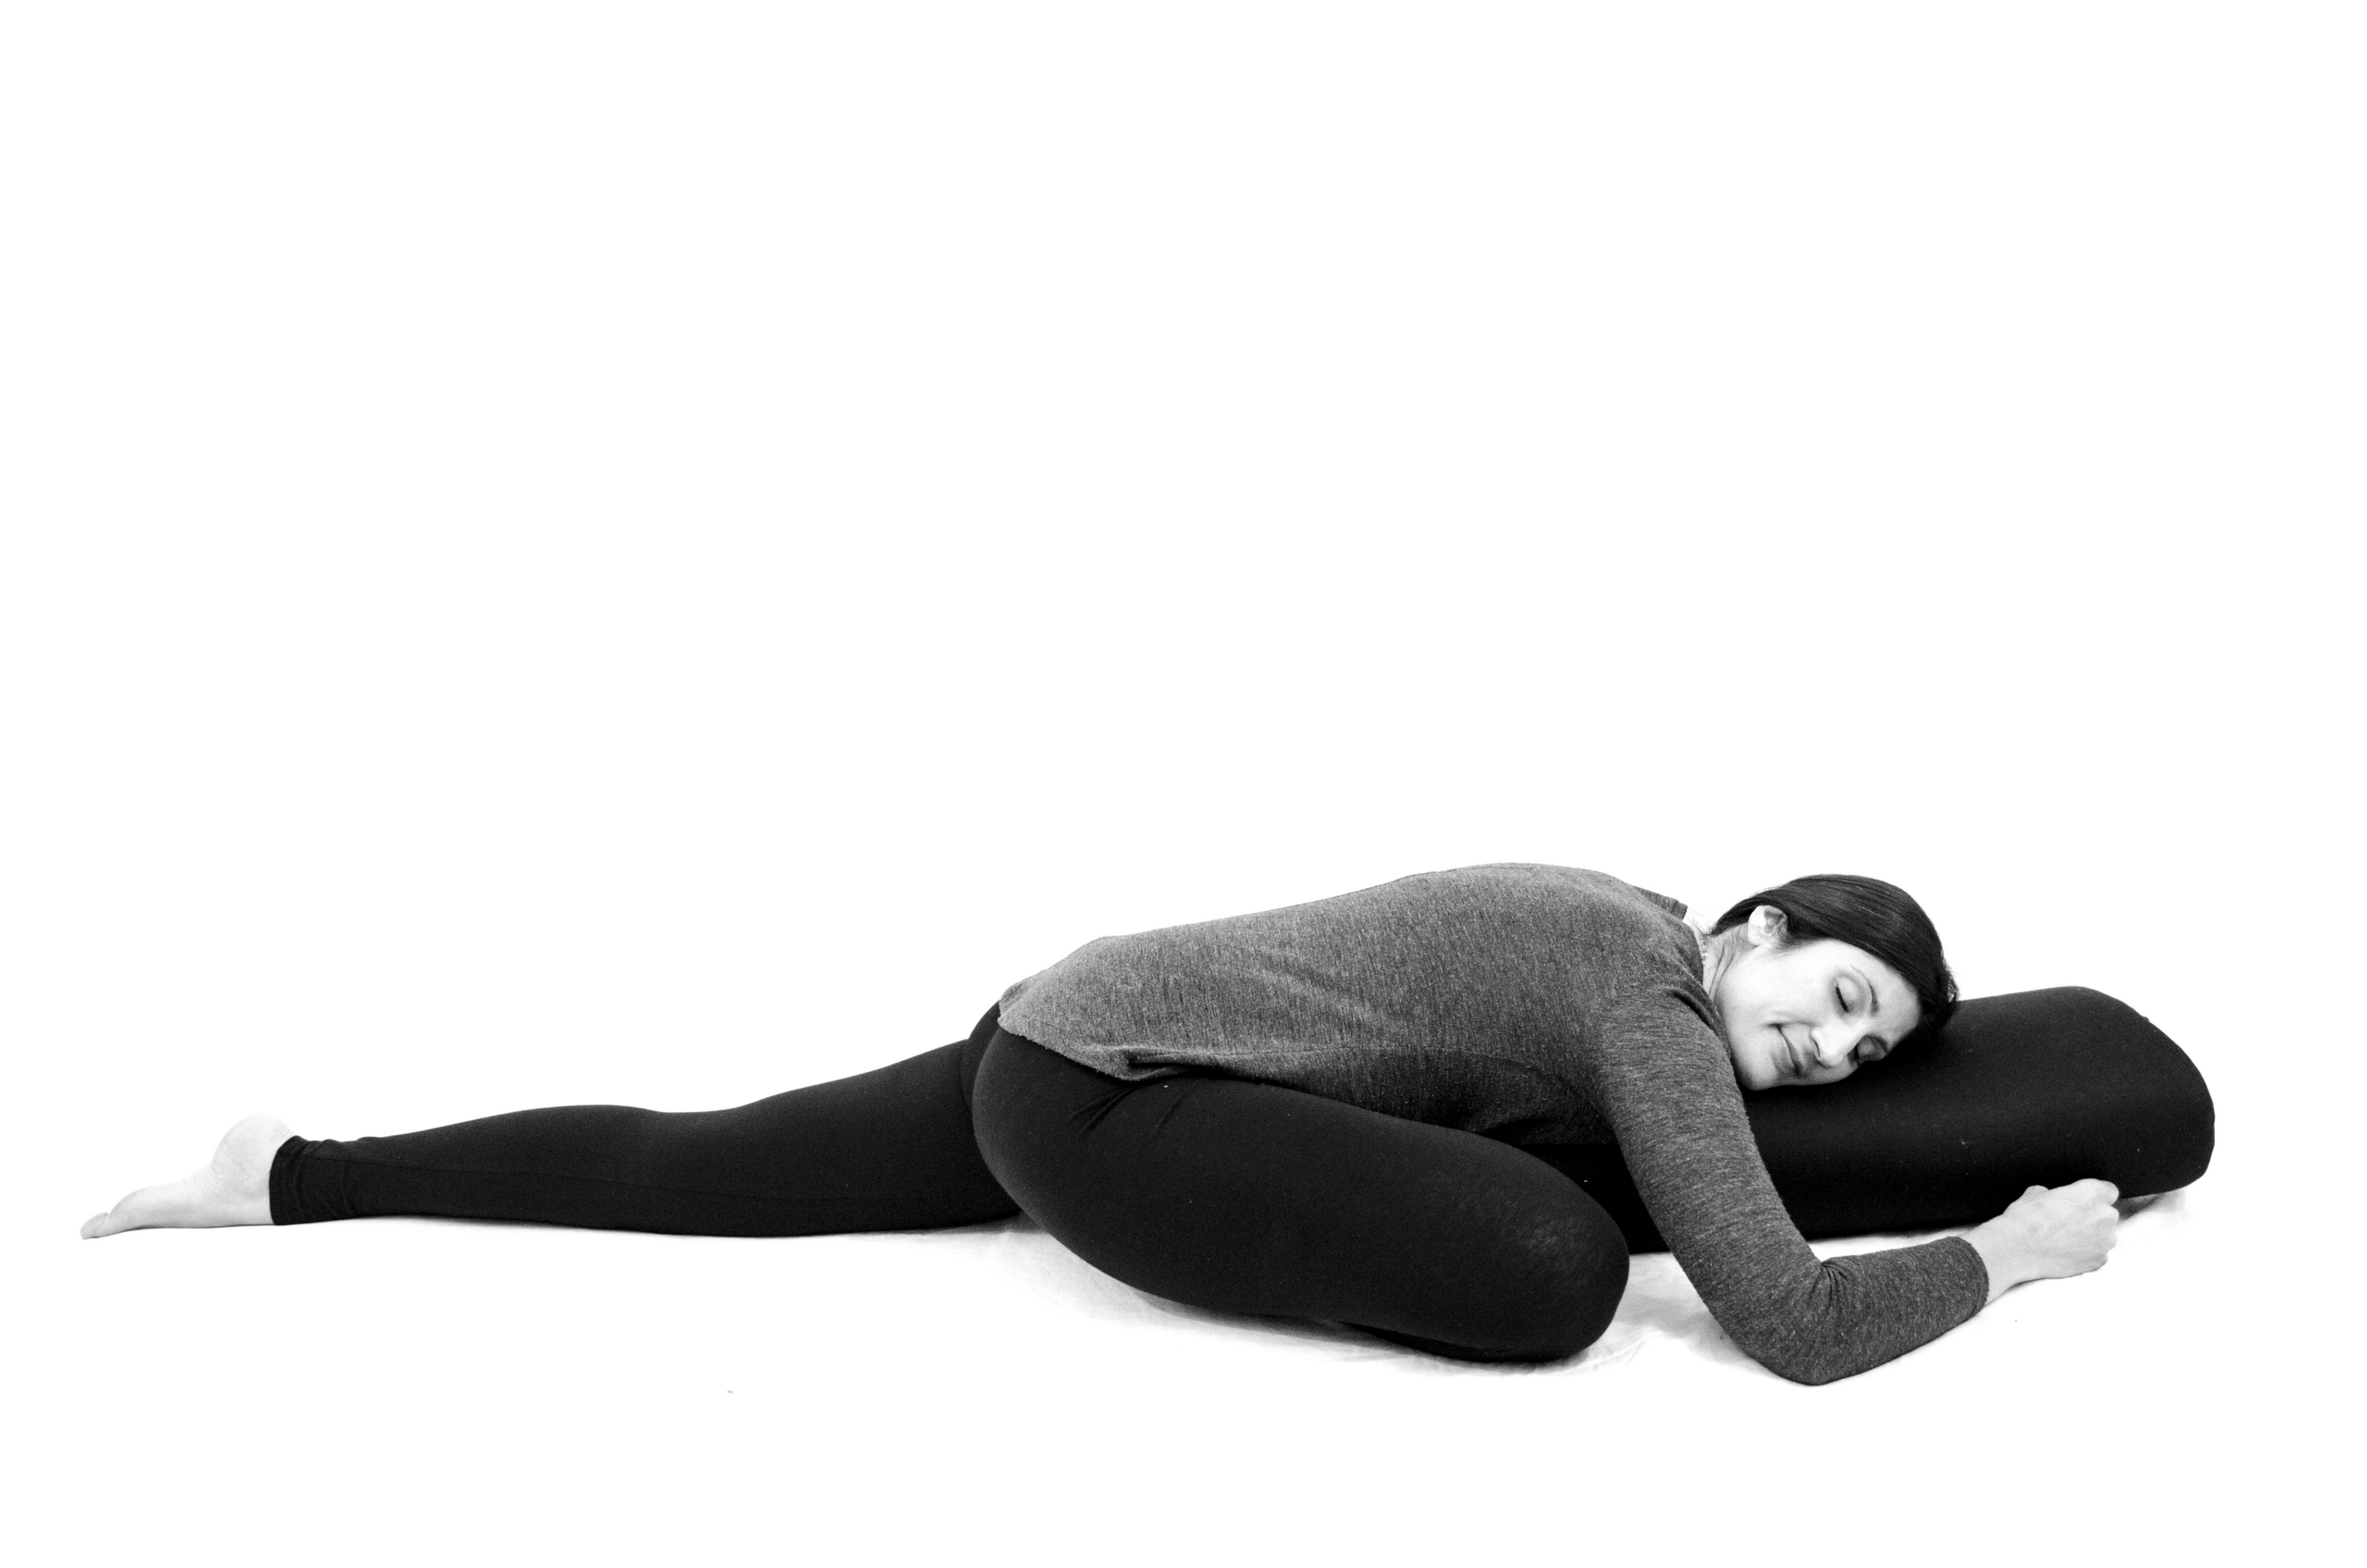
1. Torso on the bolster
This is the basic setup, and it works well when your hips are fairly open.
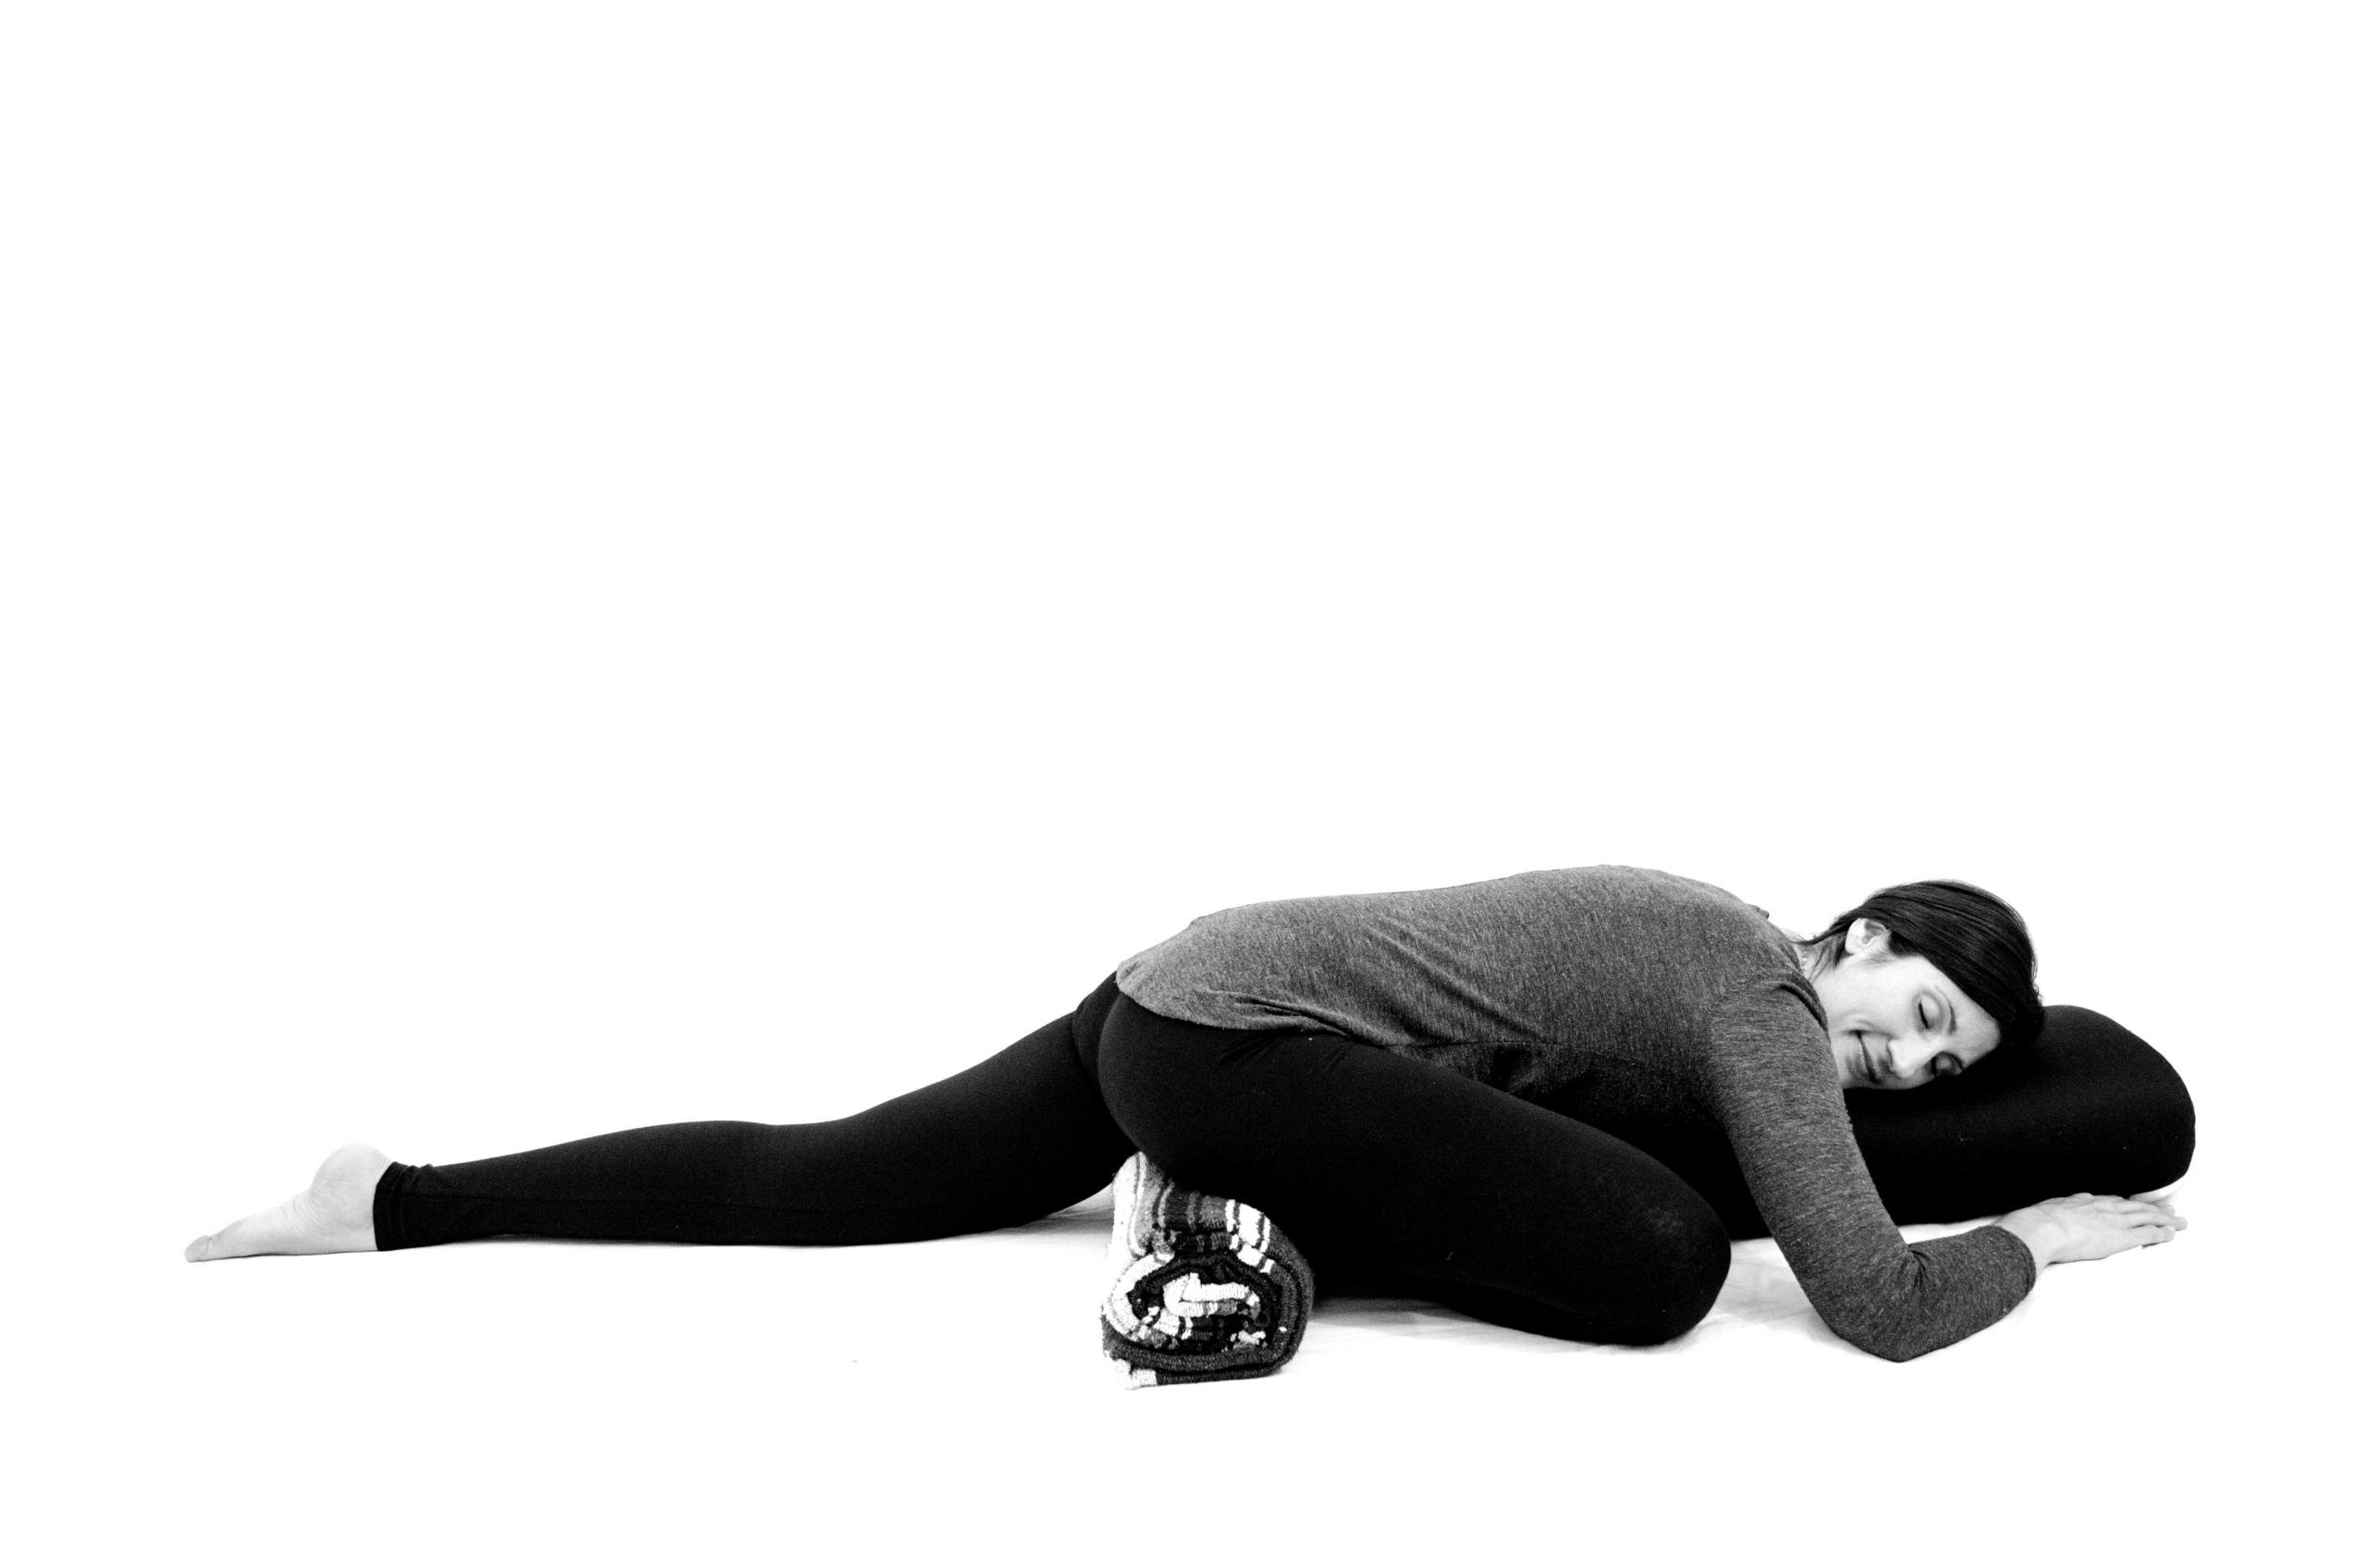
2. Bolster with a blanket roll under the hips
Choose this when one hip hovers higher than the other or the pose feels wobbly.
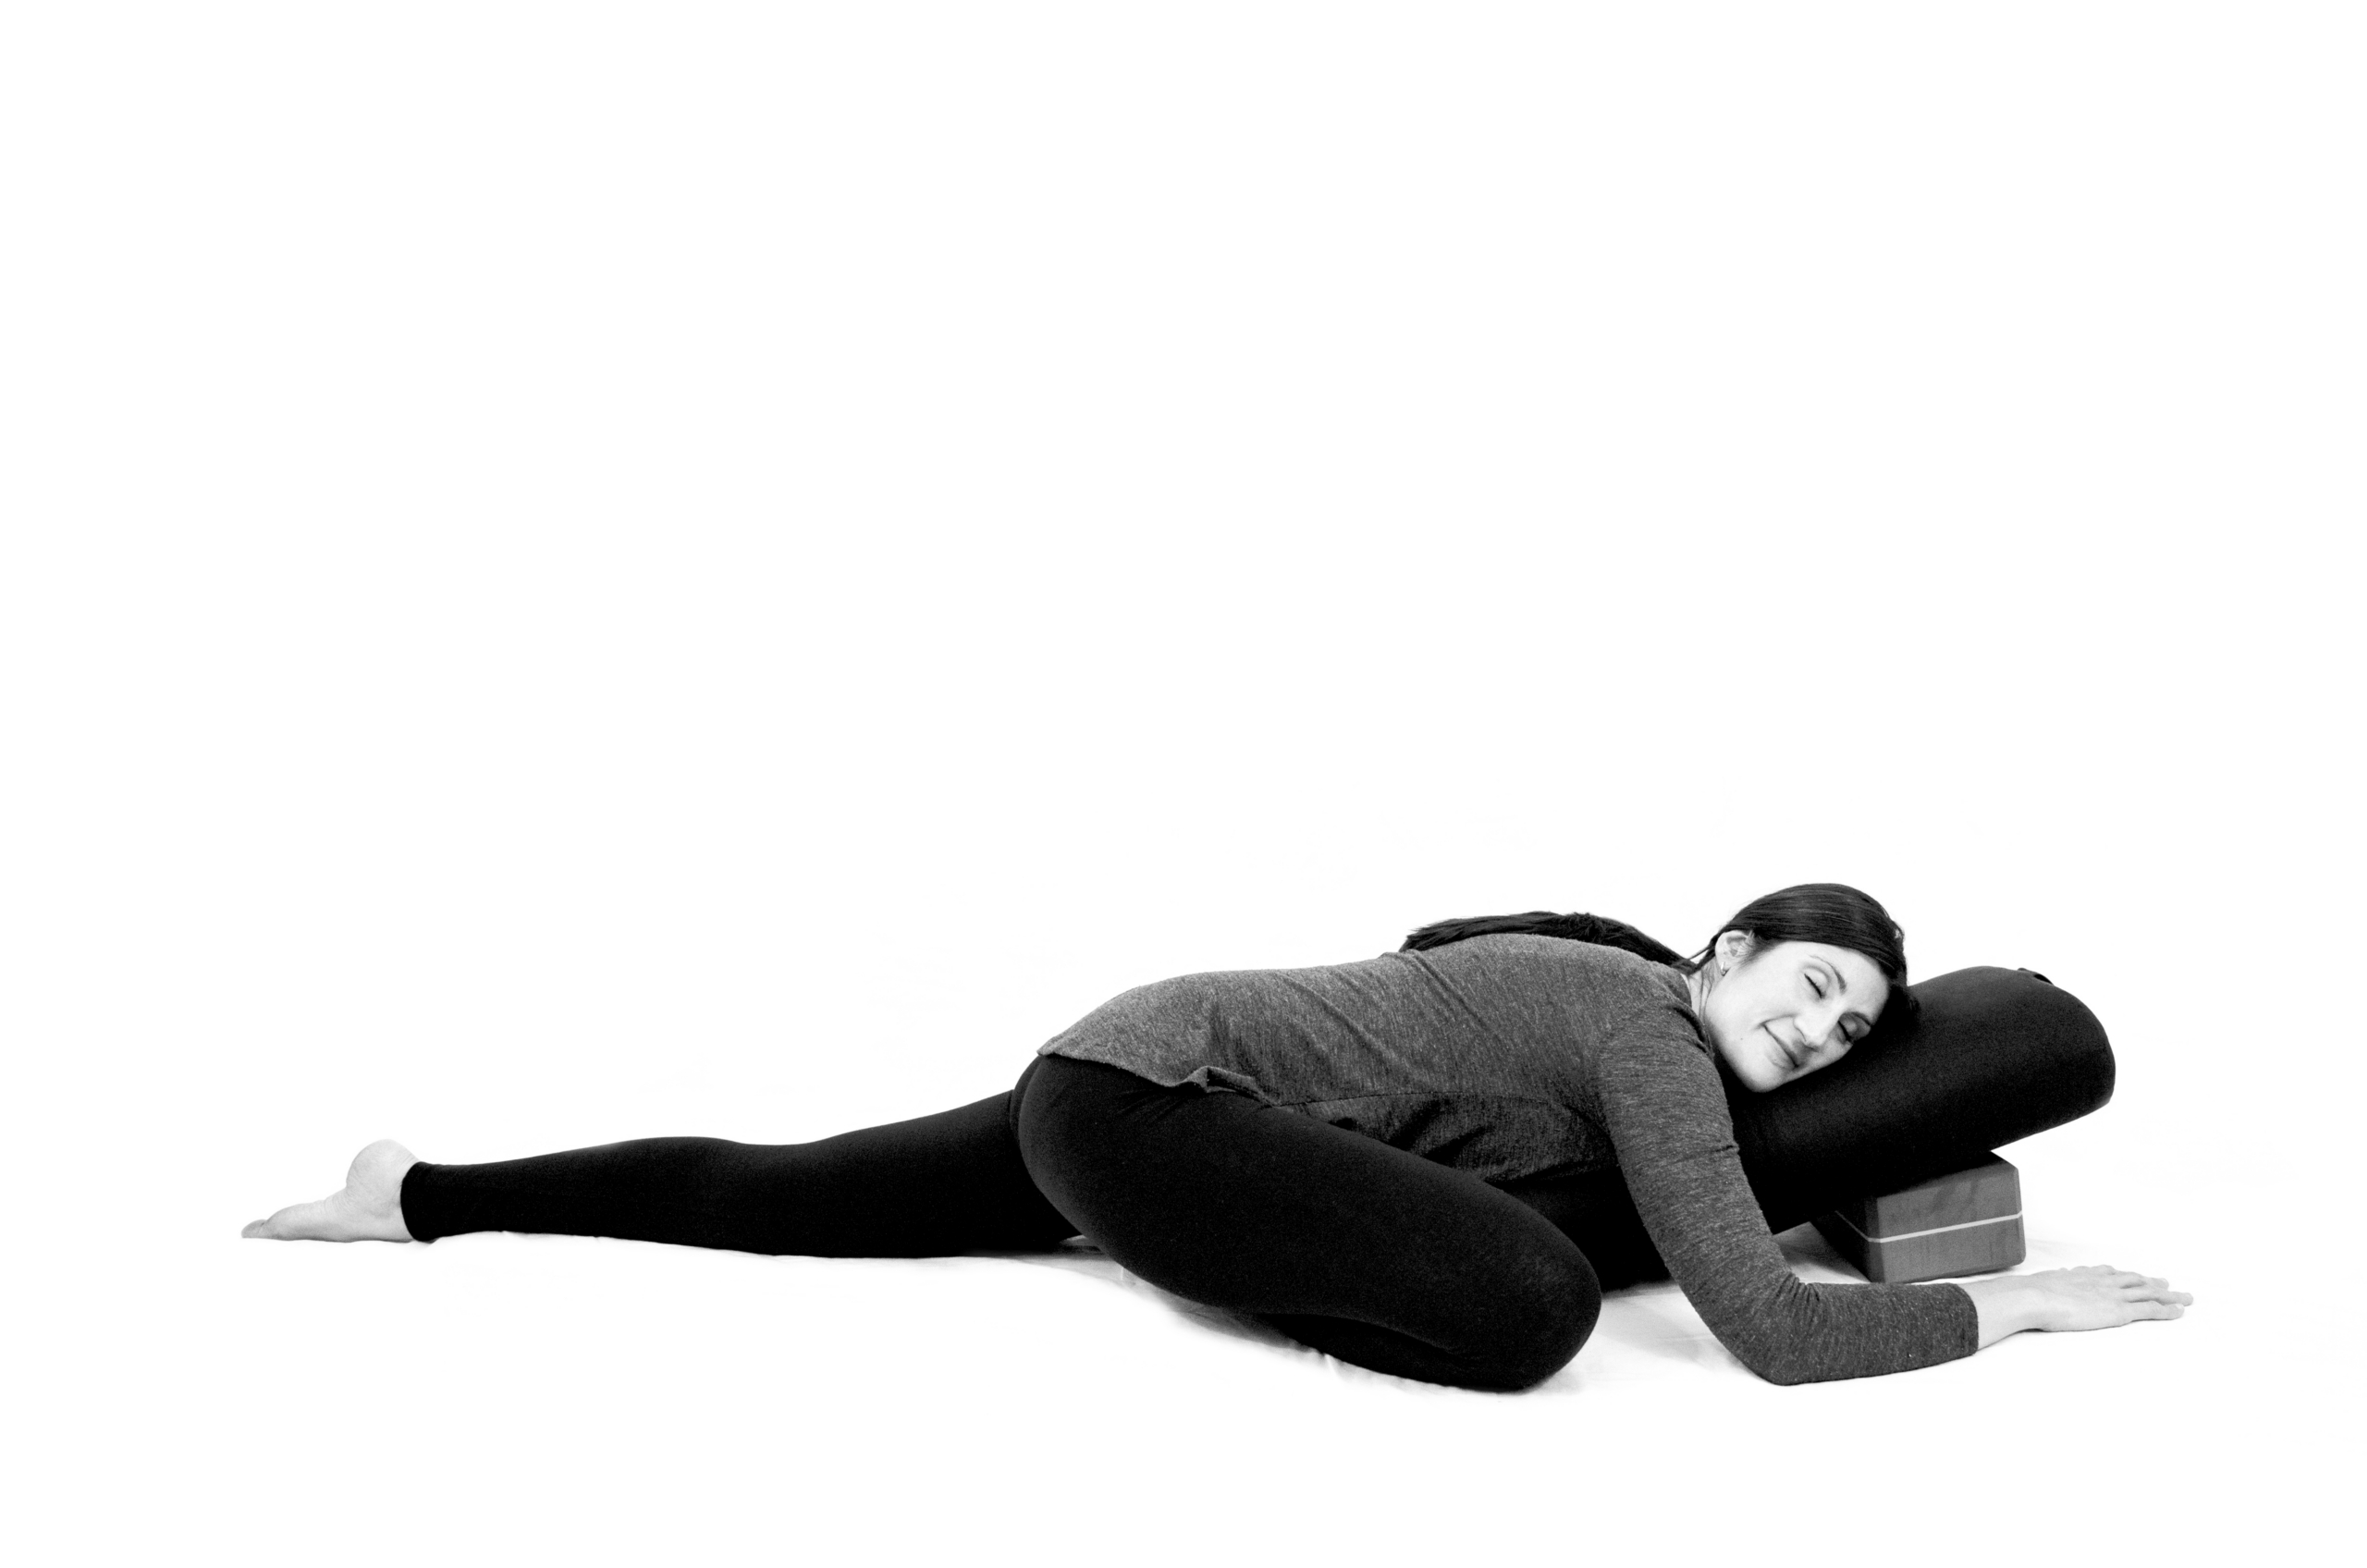
3. Bolster propped on a block
Raising the bolster brings the support up to meet you, which is helpful when folding forward pulls on your low back.
4. Bolster on a block with a blanket roll under the hips
This is the most supported version and a kind choice for flare days.
From my book: Supported Pigeon Pose is the centerpiece of Sequence #8 in Yoga for Low Back and Hip Health, a restorative practice to ease hip tension. The book walks you through the full sequence with photos of every prop setup.
Benefits of Supported Pigeon Pose
There are no quick fixes for hip and back pain, and no single pose that works the same way for everyone. Every body carries its own history, so what helps one person may need adjusting for another. With that in mind, here is what Supported Pigeon Pose can offer when you practice it regularly and kindly:
- It stretches the outer hip and buttock. On the front leg, the pose lengthens the piriformis and the gluteal muscles, which often feel tight after long hours of sitting.
- It opens the front of the hip. On the back leg, the pose gently stretches the hip flexors and the front of the thigh.
- It supports better hip mobility over time. Regular, gentle stretching can help your hips move more freely in everyday life, from getting in and out of the car to sitting on the floor.
- It can ease everyday stiffness. Many people find it a welcome release after a long day at a desk or in the car. I notice it in my own body too, since my sciatic pain still tends to return on days when I sit for too long.
- It gives you a place to slow down. Because the bolster holds you, you can rest, breathe slowly and let your whole body settle.
How the props help
- A calmer nervous system. Resting in a supported shape for a few minutes with slow breathing can help your body shift toward a parasympathetic response, which invites relaxation. Many people feel this as a slower heartbeat, less tension and a quieter mind. Researchers who study yoga therapy describe this same link between feeling safe and calming the nervous system (Sullivan et al., 2018).
- A gentler release for the hip. When you don’t have to hold yourself up, the muscles around the glutes, piriformis and hip flexors are less likely to brace against the stretch. This gives muscles and fascia time to let go gradually.
- Less strain on the hips. A blanket under your hips and a bolster under your torso hold the weight of your body. This can ease the pinching some people feel in the unsupported version.
- A kinder stretch for the low back. Resting your chest on the bolster gives the muscles along your low back a gentle stretch. Your spine stays supported the whole time, so you can relax into the stretch instead of holding yourself up.
How yoga philosophy can bring relief
The very first line of Patanjali’s Yoga Sutras is atha yoga anushasanam, which means “now, the teachings of yoga” (Sutra 1.1). Many people with low back pain, myself included, come to yoga after trying everything else and feeling they have run out of options. If that sounds familiar, this first sutra offers a next step on the journey toward relief. Now is the time to practice yoga.
Then once we begin, we may feel how our practice grounds us in the present moment. The present moment is where we cultivate awareness of what is, of what we feel and of where we are holding tension or emotional pain. Supported Pigeon offers a quiet place to connect with what you may have carried in your hips for a long time. Noticing where you hold tension is often the first step toward letting it go, and this is where relief can begin. This posture is helpful for beginners and experienced yogis alike.
Being present with chronic tension or pain isn’t easy. Many of us learn to brace around the pain without even realizing it, holding it in the mind, the body, the breath and the nervous system. When you become aware in the moment, you have a chance to connect with yourself and with what you feel, with compassion. Practicing restorative postures with presence cultivates space for that bracing to soften, a little at a time. So we start now, with one posture and one breath.
Build it into a practice
I like to practice Supported Pigeon after a few poses that warm the hips. In my book, I often lead into it with Four Part Pigeon. You begin on your hands, lower to your forearms, lift the back knee briefly to stretch the hip flexor and then fold onto the bolster for the supported rest.
Here is a short version you can try today:
- Cat/Cow Tilts, 5 to 8 rounds
- Low Lunge with hands on the thigh, 20 slow breaths on each side
- Supported Pigeon Pose, 3 to 6 minutes on each side
- Reclined Knee Hug, 10 breaths
For more on easing hip pain, see my guide to gentle yoga for hip pain. If your pain sits lower and closer to the tailbone, my post on yoga for SI joint pain may help.
Frequently asked questions
What is supported pigeon pose?
It’s a restorative version of pigeon pose in which a bolster or folded blankets hold up your torso as you fold over your front leg. The support lets you stay longer and encourages nervous system regulation, which can help ease tension in tight hips and sore backs.
How long should I hold supported pigeon pose?
I suggest 4 to 6 minutes on each side once you’re comfortable in it. If you’re new to the pose, start with 2 or 3 minutes and build up gradually.
Is pigeon pose good for sciatica?
It can help when a tight piriformis muscle is pressing on the sciatic nerve, which is often called piriformis syndrome. If you have numbness, burning or electric pain down the whole leg, see your doctor first, because those symptoms can point to a disc issue.
What if pigeon pose hurts my knee?
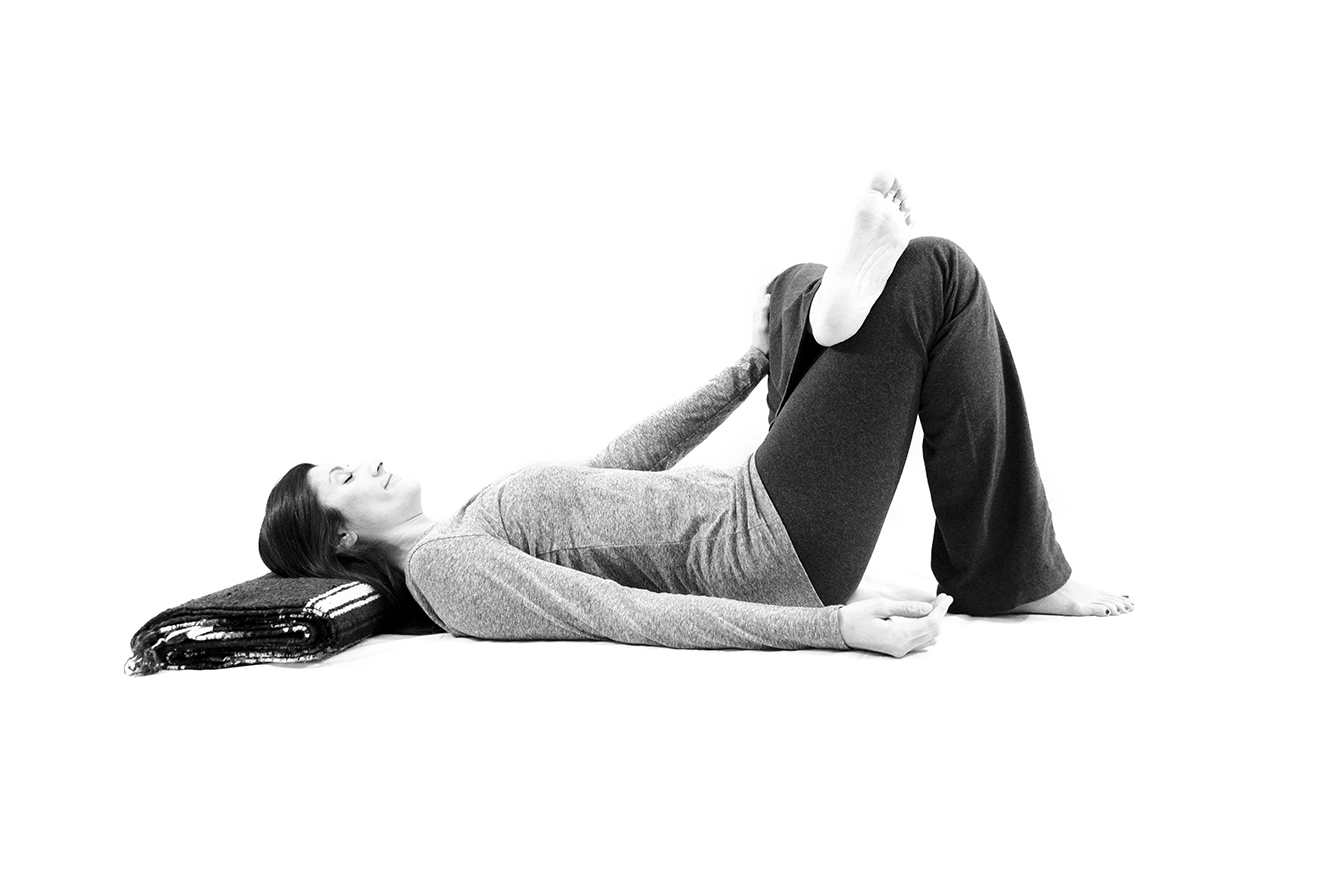
Try Reclined Pigeon Pose instead. Lie on your back, cross your right ankle over your left thigh and keep your right foot flexed. Gently press the right knee away from you. It stretches the same area of the hip with less pressure on the knee.
Can I do supported pigeon without a bolster?
Yes. Two or three blankets folded into long rectangles and stacked make a good substitute, and bed pillows or firm cushions can work too.
Take the next step
Ready for the full practice?
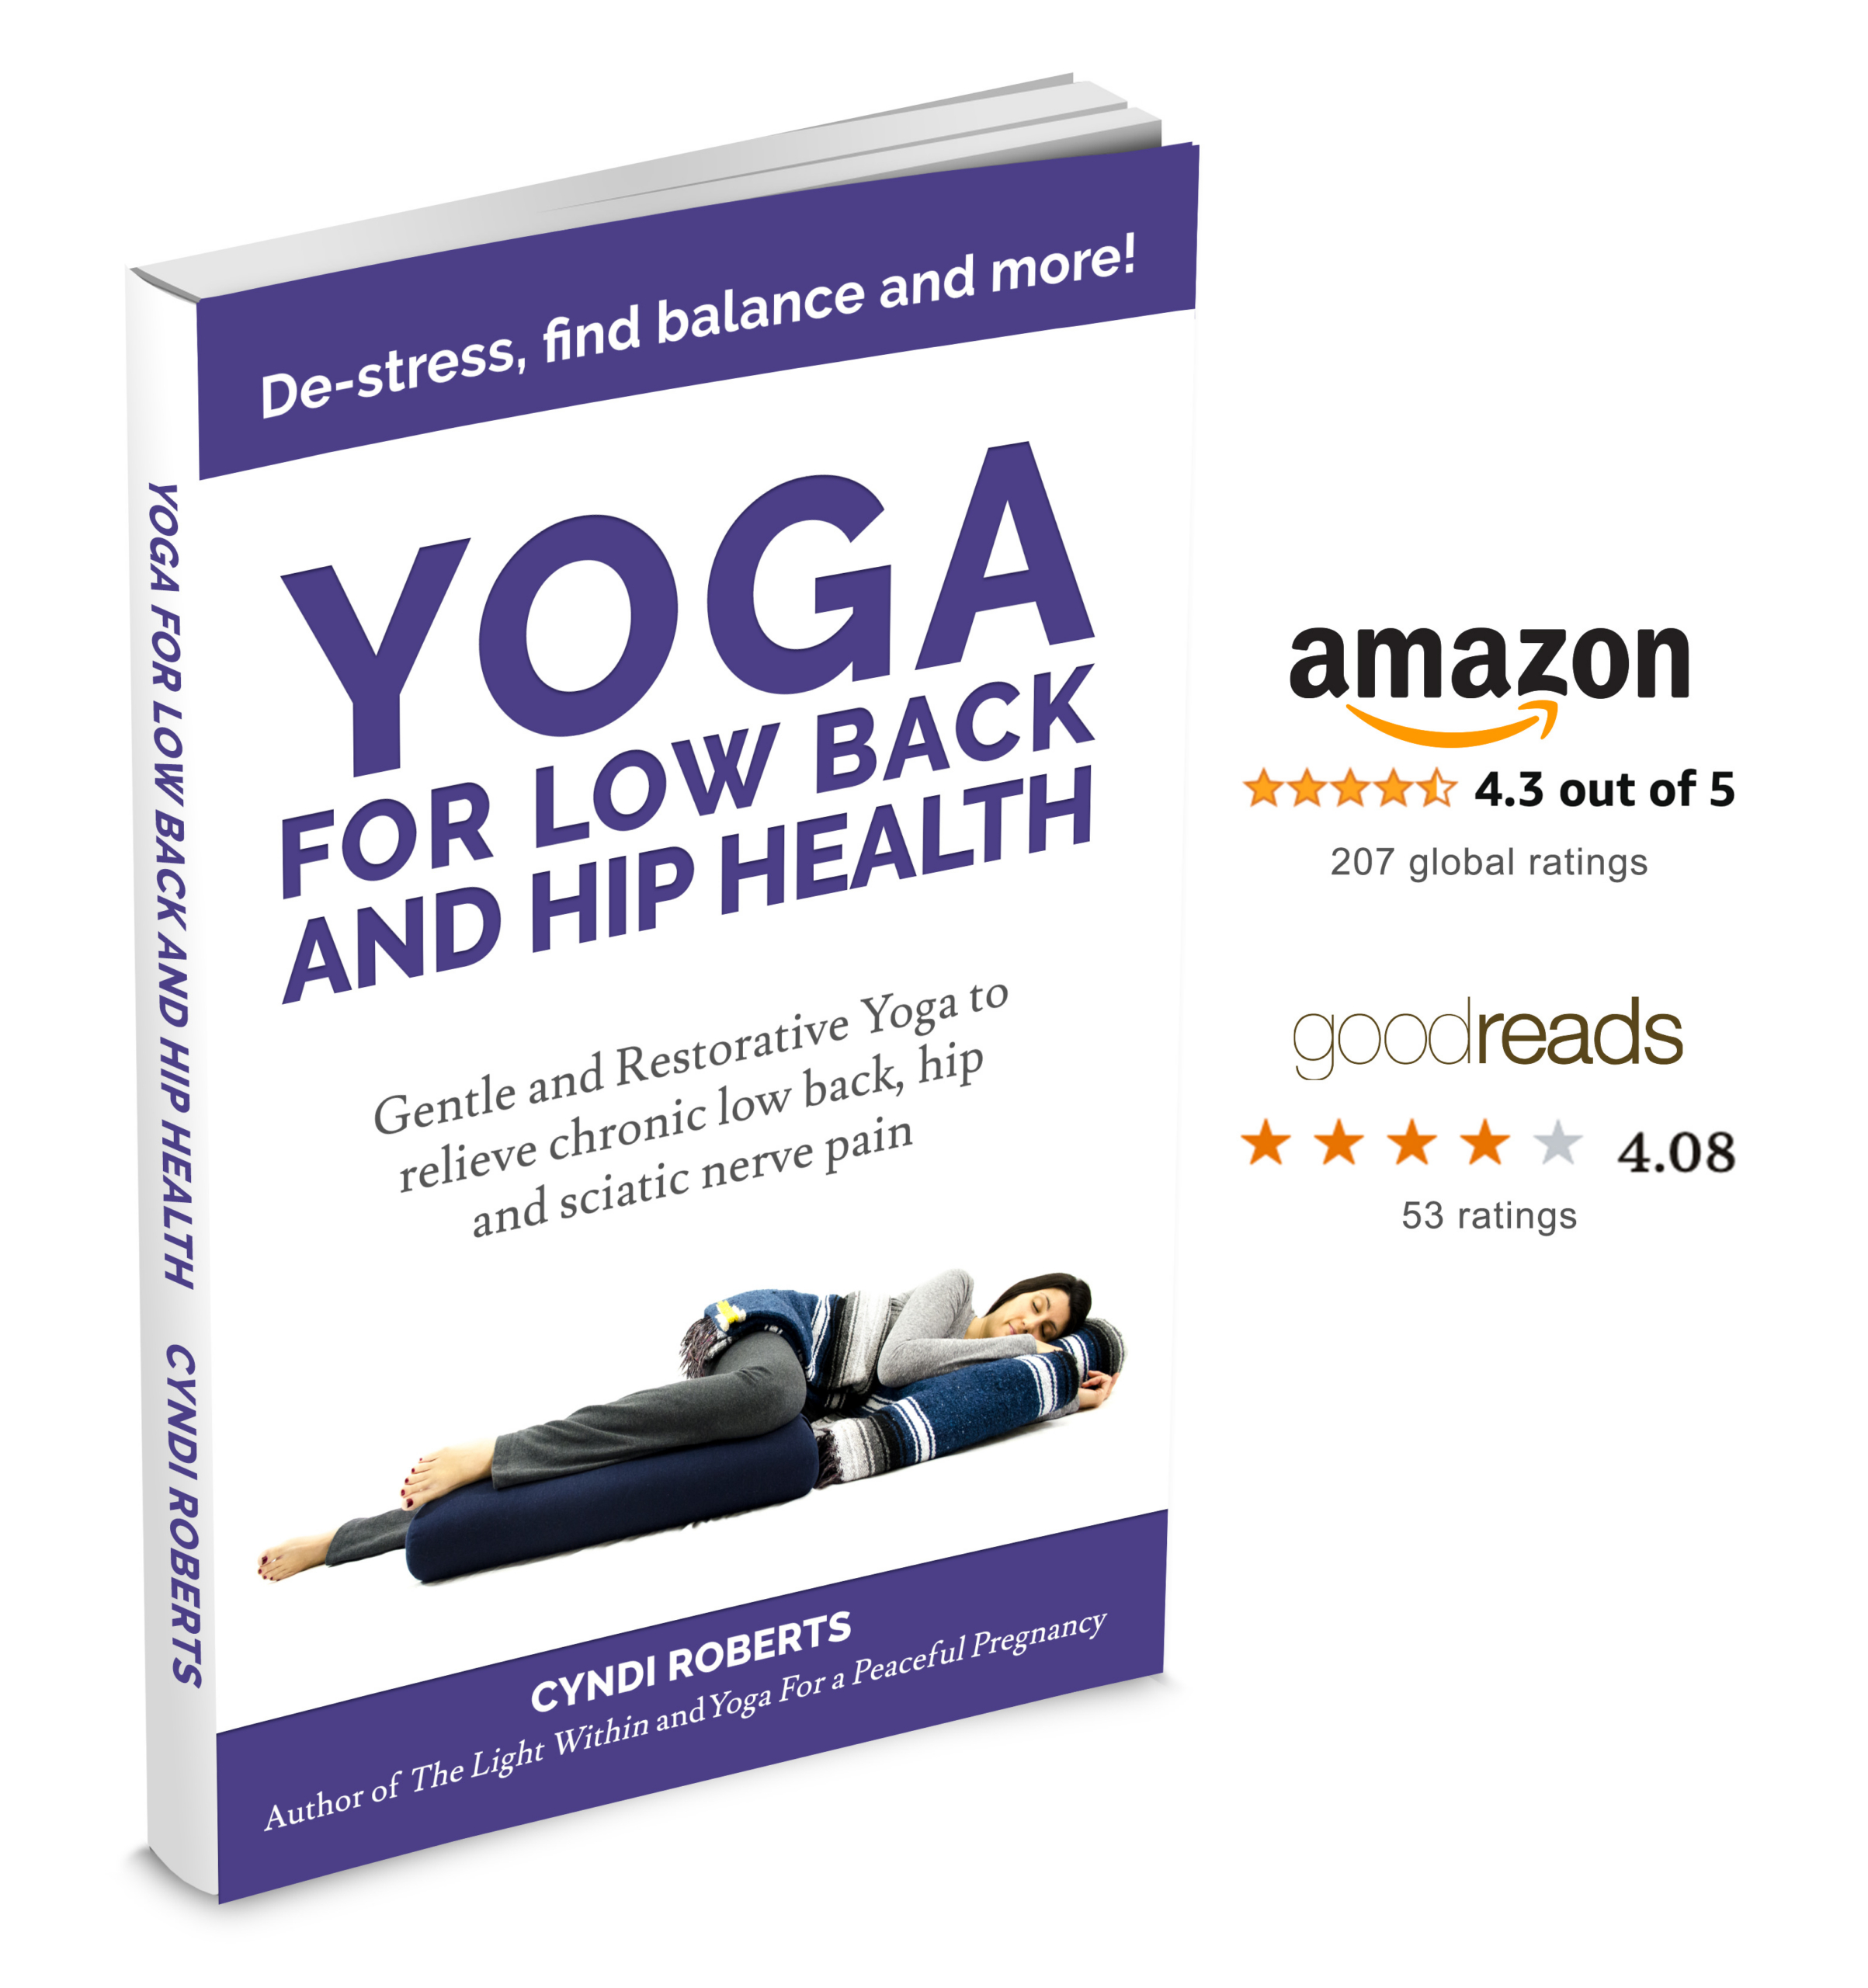
Yoga for Low Back and Hip Health gives you 43 poses and 15 gentle and restorative sequences for low back pain, hip tension and sciatic nerve pain, with over 300 photos and step-by-step instruction for every prop setup. Supported Pigeon Pose is a key part of Sequence #8 for easing hip tension.
Would you like a gentle practice to listen to tonight?
Start with one of my free guided audios. It’s a gentle way to settle your body and breath at the end of the day.
Want help with your own body?
If you’d like help choosing the right poses for your body, I also offer private yoga therapy sessions.
May you walk with peace. Namaste.
Sources
- Roberts, C. (2016). Yoga for Low Back and Hip Health: Gentle and Restorative Yoga to Relieve Chronic Low Back, Hip and Sciatic Nerve Pain. Supported Pigeon Pose, Four Part Pigeon and Sequence #8.
- Sullivan, M. B., Erb, M., Schmalzl, L., Moonaz, S., Noggle Taylor, J. and Porges, S. W. (2018). Yoga Therapy and Polyvagal Theory: The Convergence of Traditional Wisdom and Contemporary Neuroscience for Self-Regulation and Resilience. Frontiers in Human Neuroscience, 12, 67.
- Bryant, E. F. (2009). The Yoga Sūtras of Patañjali: A New Edition, Translation, and Commentary. New York: North Point Press. Sutra 1.1, atha yoga anuśāsanam.
