Gentle Yoga For Back Tension
If you suffer from tension in the low, mid or upper back, moving the spine in all six directions with these simple yoga poses will help relieve the tightness you feel.
This short sequence is perfect to reduce stress in the spine from prolonged sitting at the office or driving. It’s also useful to increase lung capacity by softening respiration muscles, which allows for deeper, more soothing breaths. Deeper breaths kick on the relaxation response in the body, relieving anxiety and stress.
By practicing this sequence, you are not only relieving tension in the back body, but also reducing stiffness in the front and side bodies.
Improving the health of the spine by bringing movement to the joints relieves stiffness and increases synovial fluid, which lubricates the joints. Lubricated joints are less prone to injury or pain.
The spine can move in six directions: forward bends, back bends, lateral movements (right/left), and twisting motions (right/left).
These movements are beneficial for a variety of reasons:
- Forward bends:
- Create length and space in the spine, countering compression
- Soothing and calming to the nervous system, stress-relieving
- Backbends:
- Elevate mood and relieve sadness and depression
- Soften and open compressed and tight front body, countering forward-rolling shoulders
- Lateral movement/side bends (left/right):
- Lengthen muscles between the ribs and pelvis (including parts of the low back), opens the rib cage, expanding lungs for easier breathing
- Loosens tension in spine and torso
- Twists (left/right):
- Gentle rotation of the spine, which improves mobility between the joints
- Increase blood flow to digestive organs, thereby increasing organ function
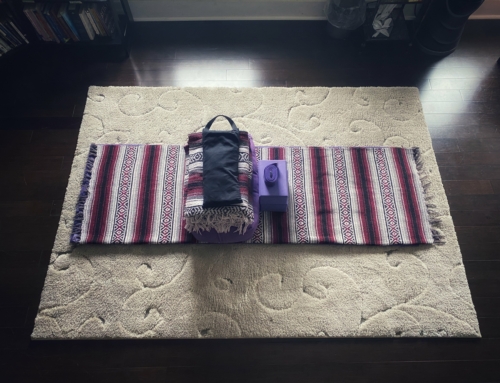
This sequence should be done every day for maximum results. All you need is a blanket.
To Practice:
- Find a quiet space with no distractions
- Sit up on a blanket in cross legged seat with the right leg in front. Get the hips higher than the knees and relax the buttocks and legs.
[x_row inner_container=”true” marginless_columns=”false” bg_color=”” style=”margin: 0px auto 0px auto; padding: 0px 0px 0px 0px; “][x_column bg_color=”” type=”1/2″ style=”padding: 0px 0px 0px 0px; “][x_image type=”rounded” src=”https://www.yogawithcr.com/wp-content/uploads/2015/04/seated-cat-pose.jpg” alt=”Seated Cow Pose” href=”#” title=”” target=”” info=”none” info_place=”top” info_trigger=”hover” info_content=””][/x_column][x_column bg_color=”” type=”1/2″ style=”padding: 0px 0px 0px 0px; “][x_image type=”rounded” src=”https://www.yogawithcr.com/wp-content/uploads/2015/04/seated-cow-pose.jpg” alt=”Seated Cow Pose” link=”false” href=”#” title=”” target=”” info=”none” info_place=”top” info_trigger=”hover” info_content=””][/x_column][/x_row]
Seated Cat Cow Tilts
- Place the hands on the knees and as you inhale, draw the ribs and heart forward, gazing up (if there is no neck injury).
- As you exhale, drop the head, round the back and gaze at the belly button as you press out through the back of the shoulder blades.
- Take 10-20 rounds of breath, softening the jaw and face as you breathe.
- Come back to a neutral spine when finished.
[x_row inner_container=”true” marginless_columns=”false” bg_color=”” style=”margin: 0px auto 0px auto; padding: 0px 0px 0px 0px; “][x_column bg_color=”” type=”1/2″ style=”padding: 0px 0px 0px 0px; “][x_image type=”rounded” src=”https://www.yogawithcr.com/wp-content/uploads/2015/04/seated-side-bend-right-gaze-down-copy.jpg” alt=”Seated Side Bend – Right” href=”#” title=”” target=”” info=”none” info_place=”top” info_trigger=”hover” info_content=””][/x_column][x_column bg_color=”” type=”1/2″ style=”padding: 0px 0px 0px 0px; “][x_image type=”rounded” src=”https://www.yogawithcr.com/wp-content/uploads/2016/06/seated-side-bend-left-gaze-down-copy-1.jpg” alt=”Seated Side Bend – Left” link=”false” href=”#” title=”” target=”” info=”none” info_place=”top” info_trigger=”hover” info_content=””][/x_column][/x_row]
Seated Side Bend
- Place the right hand down on the earth about twelve inches away from the hip.
- Inhale the left arm up and exhale into a side bend.
- Drop the right shoulder down away from the ear and bend the right elbow as you walk the hand out.
- Gaze down at the earth if the neck feels tight, keep the head neutral, with the ear stacked over the shoulder or gaze up at top arm.
- Use inhales to lengthen and exhales to open the chest, rolling the right side of the heart up toward the sky.
- Breathe slow and deep for 10-20 cycles of breath, softening with each exhale.
[x_row inner_container=”true” marginless_columns=”false” bg_color=”” style=”margin: 0px auto 0px auto; padding: 0px 0px 0px 0px; “][x_column bg_color=”” type=”1/2″ style=”padding: 0px 0px 0px 0px; “][x_image type=”rounded” src=”https://www.yogawithcr.com/wp-content/uploads/2015/04/yoga-for-low-back-tension-1-1080-images.jpg” alt=”Seated Twist – Right” link=”false” href=”#” title=”yoga for low back tension – seated twist – right” target=”” info=”none” info_place=”top” info_trigger=”hover” info_content=””][/x_column][x_column bg_color=”” type=”1/2″ style=”padding: 0px 0px 0px 0px; “][x_image type=”rounded” src=”https://www.yogawithcr.com/wp-content/uploads/2015/04/seated-side-bend-gaze-neutral-2-copy.jpg” alt=”Seated Twist – Left” link=”false” href=”#” title=”yoga for low back pain – seated twist – left” target=”” info=”none” info_place=”top” info_trigger=”hover” info_content=””][/x_column][/x_row]
Seated Twist
- Inhale the back to a straight spine and lengthen the arms up to the sky, finding length in the side body.
- As you exhale, twist to the right, bringing the left hand on the right knee and right hand to the earth.
- Be sure the shoulders are stacked over the hips and the twist is coming from the torso, not the shoulders.
- Use inhales to lengthen and exhales to deepen the twist.
- Gaze over the back shoulder or keep the chin parallel to the chest if there are any neck injuries.
[x_row inner_container=”true” marginless_columns=”false” bg_color=”” style=”margin: 0px auto 0px auto; padding: 0px 0px 0px 0px; “][x_column bg_color=”” type=”1/2″ style=”padding: 0px 0px 0px 0px; “][x_image type=”rounded” src=”https://www.yogawithcr.com/wp-content/uploads/2015/04/seated-forward-fold-round-spine-copy.jpg” alt=”Forward Bend – Curved Spine” link=”false” href=”#” title=”yoga for low back pain – seated forward fold – rounded spine” target=”” info=”none” info_place=”top” info_trigger=”hover” info_content=””][/x_column][x_column bg_color=”” type=”1/2″ style=”padding: 0px 0px 0px 0px; “][x_image type=”rounded” src=”https://www.yogawithcr.com/wp-content/uploads/2015/04/seated-forward-fold-forearms-straight-spine-copy.jpg” alt=”Forward Bend – Straight Spine” link=”false” href=”#” title=”yoga for low back pain – seated forward bend – straight spine” target=”” info=”none” info_place=”top” info_trigger=”hover” info_content=””][/x_column][/x_row]
Seated Forward Fold
- To release, inhale, bringing the spine back to neutral as you lengthen the arms up, again finding length in the side body, and exhale into a forward fold.
- If there is a low back injury, work this fold with a straight spine.
- Tailbone drops down to the earth as a strong line of energy flows up the spine through the crown of the head, without rounding the shoulders. The gaze is down.
- If there is no injury in the low back, feel free to round the back and shoulders as you drop the head down.
- Breathe into the hips and soften the legs and feet for 10-20 cycles of breath.
- Come back to a neutral spine when finished and switch the cross of the legs and practice this sequence on the other side.
- After the other side is complete, sit quietly with the eyes closed for a few more deep breaths.
- Drop the tailbone down to the earth and reach out through the crown of the head. Visualize length and space in the low, mid and upper back as you cascade the breath up and down the spine, releasing any remaining tension between the discs.
Oops! We could not locate your form.


