“Low back and neck pain is an increasingly widespread and expensive condition worldwide, costing the US alone $88 billion a year—the third highest bill for any health condition—despite evidence most treatments do not work.”
– The Guardian
Eight out of ten people will experience neck or back pain in their lives. Those numbers are rising, as well as the cost of ineffective treatments—up nearly 300% over a period of 17 years.
I’ve worked width so many people that carry the burden of life on their shoulders—literally. Add to that how much time we spend sitting at computers and the poor posture developed from prolonged smartphone use, and it’s no wonder everyone’s in pain!
I see this so often with my clients that I wanted to share the following stretches. They’ll not only stretch out the muscles carrying tension but are low-impact and safe for the joints.
Seated Butterfly with Shoulder Stretches and Side Bend provides an optional hip opener by sitting in Butterfly pose. If this position of the legs is not accessible, use props under the knees for support or sit in a comfortable, cross-legged position or in a chair.
* Consult your healthcare provider prior to practicing if you have any fused discs in the cervical spine.
Shoulder Rolls
Shoulder Rolls are a very gentle and quick way to release tension in the neck and shoulders, anytime, anywhere. Practice these rolls on their own or before a posture to warm up and soften the shoulders or practice after a shoulder stretch to release the pose completely. Rolling the shoulders back helps open the chest and counter rounding forward. These rolls are a way to loosen that built-up stress and the tightened muscles in the chest and shoulders. Practice before and after Interlace Chest and Shoulder Stretch to relieve tension.
Instruction
- Practice seated or standing
- Inhale, roll shoulders forward and up to the ears
- Exhale, roll shoulders back and down
- Repeat this motion with each cycle of breath
- Option: switch directions or roll one shoulder at a time. You can even incorporate a gentle twist by moving the torso as you roll opposite shoulder
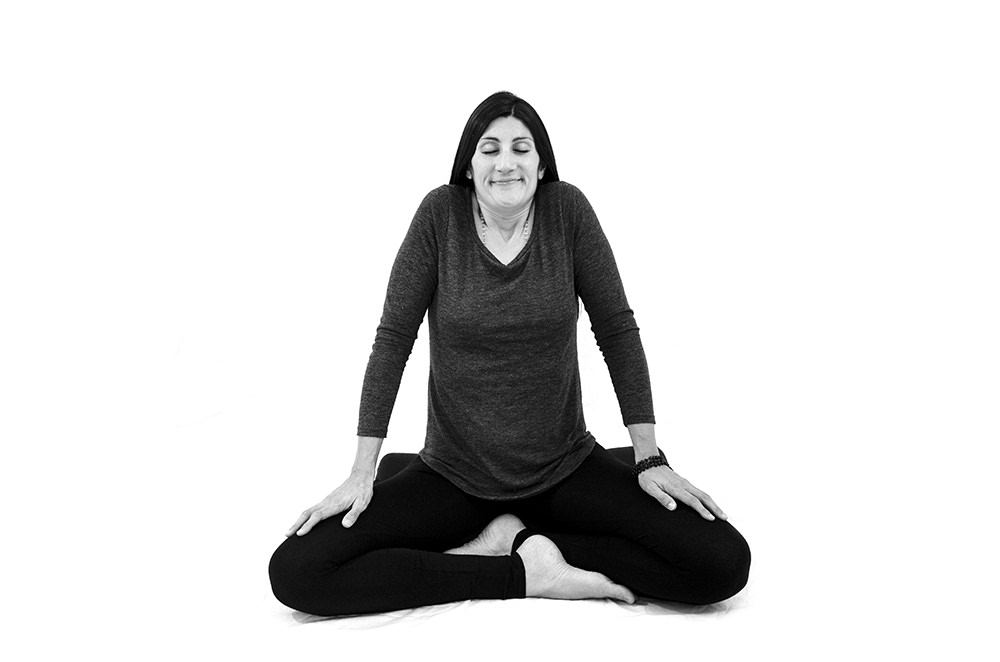
Release tension in the neck and shoulders with shoulder rolls
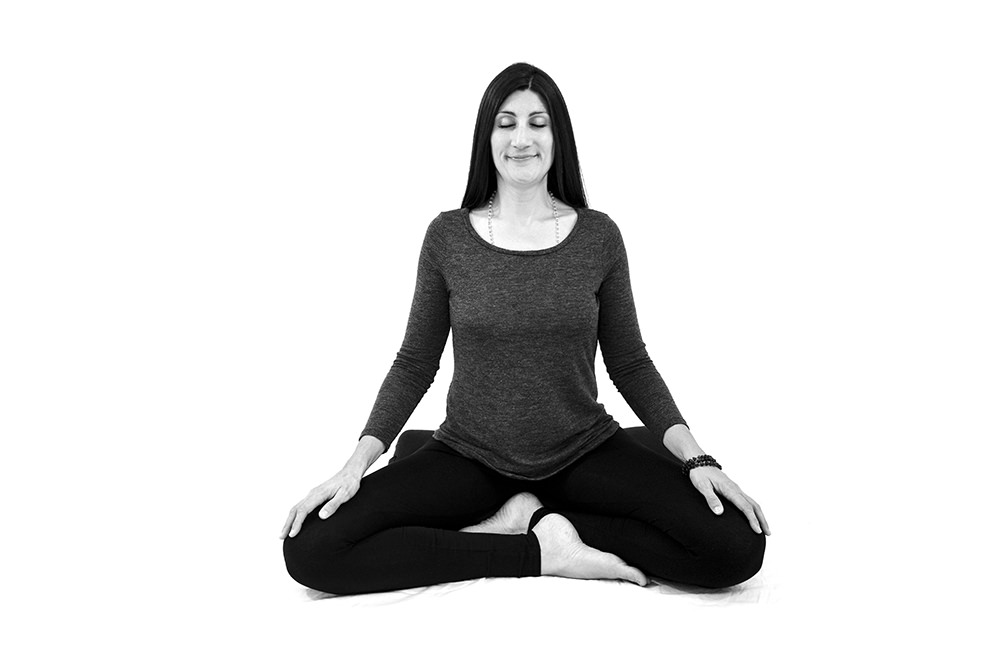
Shoulder Rolls, exhale shoulders back and down
Interlace Chest and Shoulder Stretch
This basic chest and shoulder stretch is accessible at any time during the day and at any place. Practicing this stretch opens tight pectoral muscles and lengthens the front body. Lengthening these muscles automatically makes space in the chest and prevents rounding forward.
Opening the fronts of the shoulders counters a hunched forward position that develops over time, especially when sitting for long periods of time.
Breathe into the heart space and center yourself. Open the energies of compassion, love and appreciation uniting body, mind and spirit.
Instruction
- Practice either standing or in a comfortable seated position
- Interlace the hands behind the back. If that’s not accessible, grab onto opposite wrists or forearms behind the back
- Use an inhale to lengthen the arms
- If there is space, draw the hands away from the buttocks
- Draw the shoulders down the back and breathe into the front body
- Keep lengthening the arms down away from the ears
- Suggested hold 5-20 breaths
- To release: soften the arms and release the hold or interlace. Take a few Shoulder Rolls to release the stretch completely
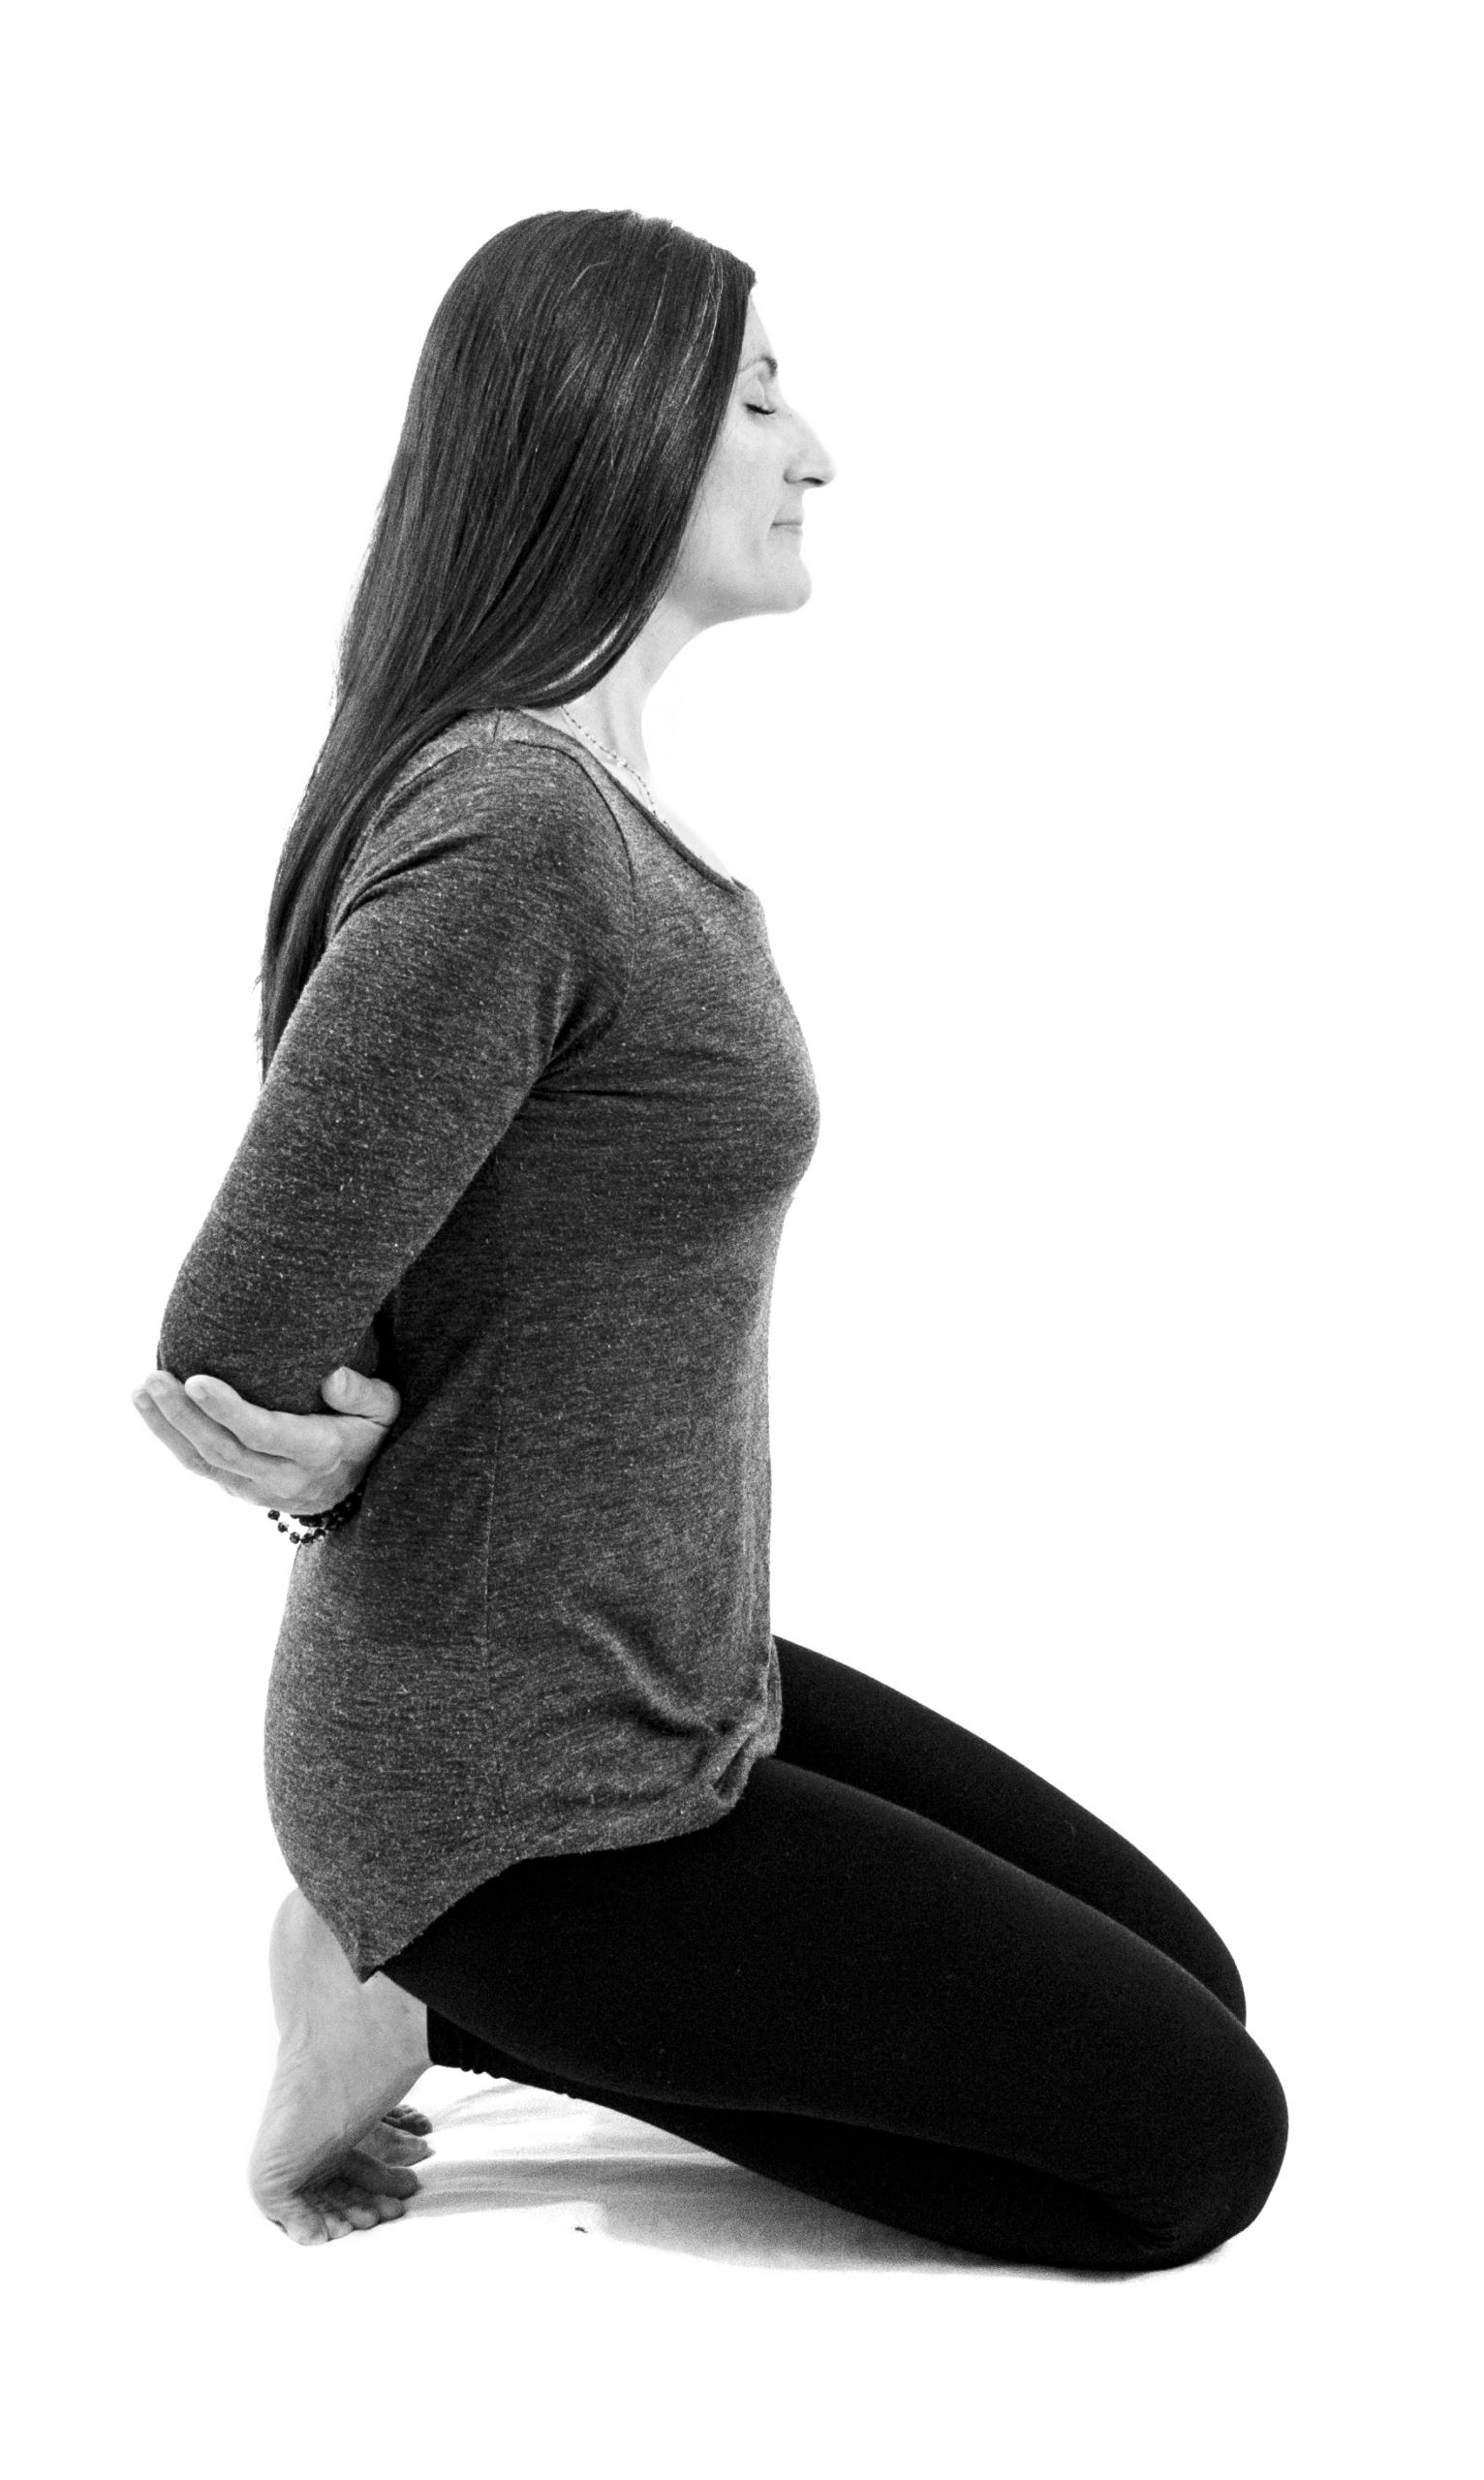
Interlace Chest and Shoulder Stretch, holding opposite elbows, toes tucked under
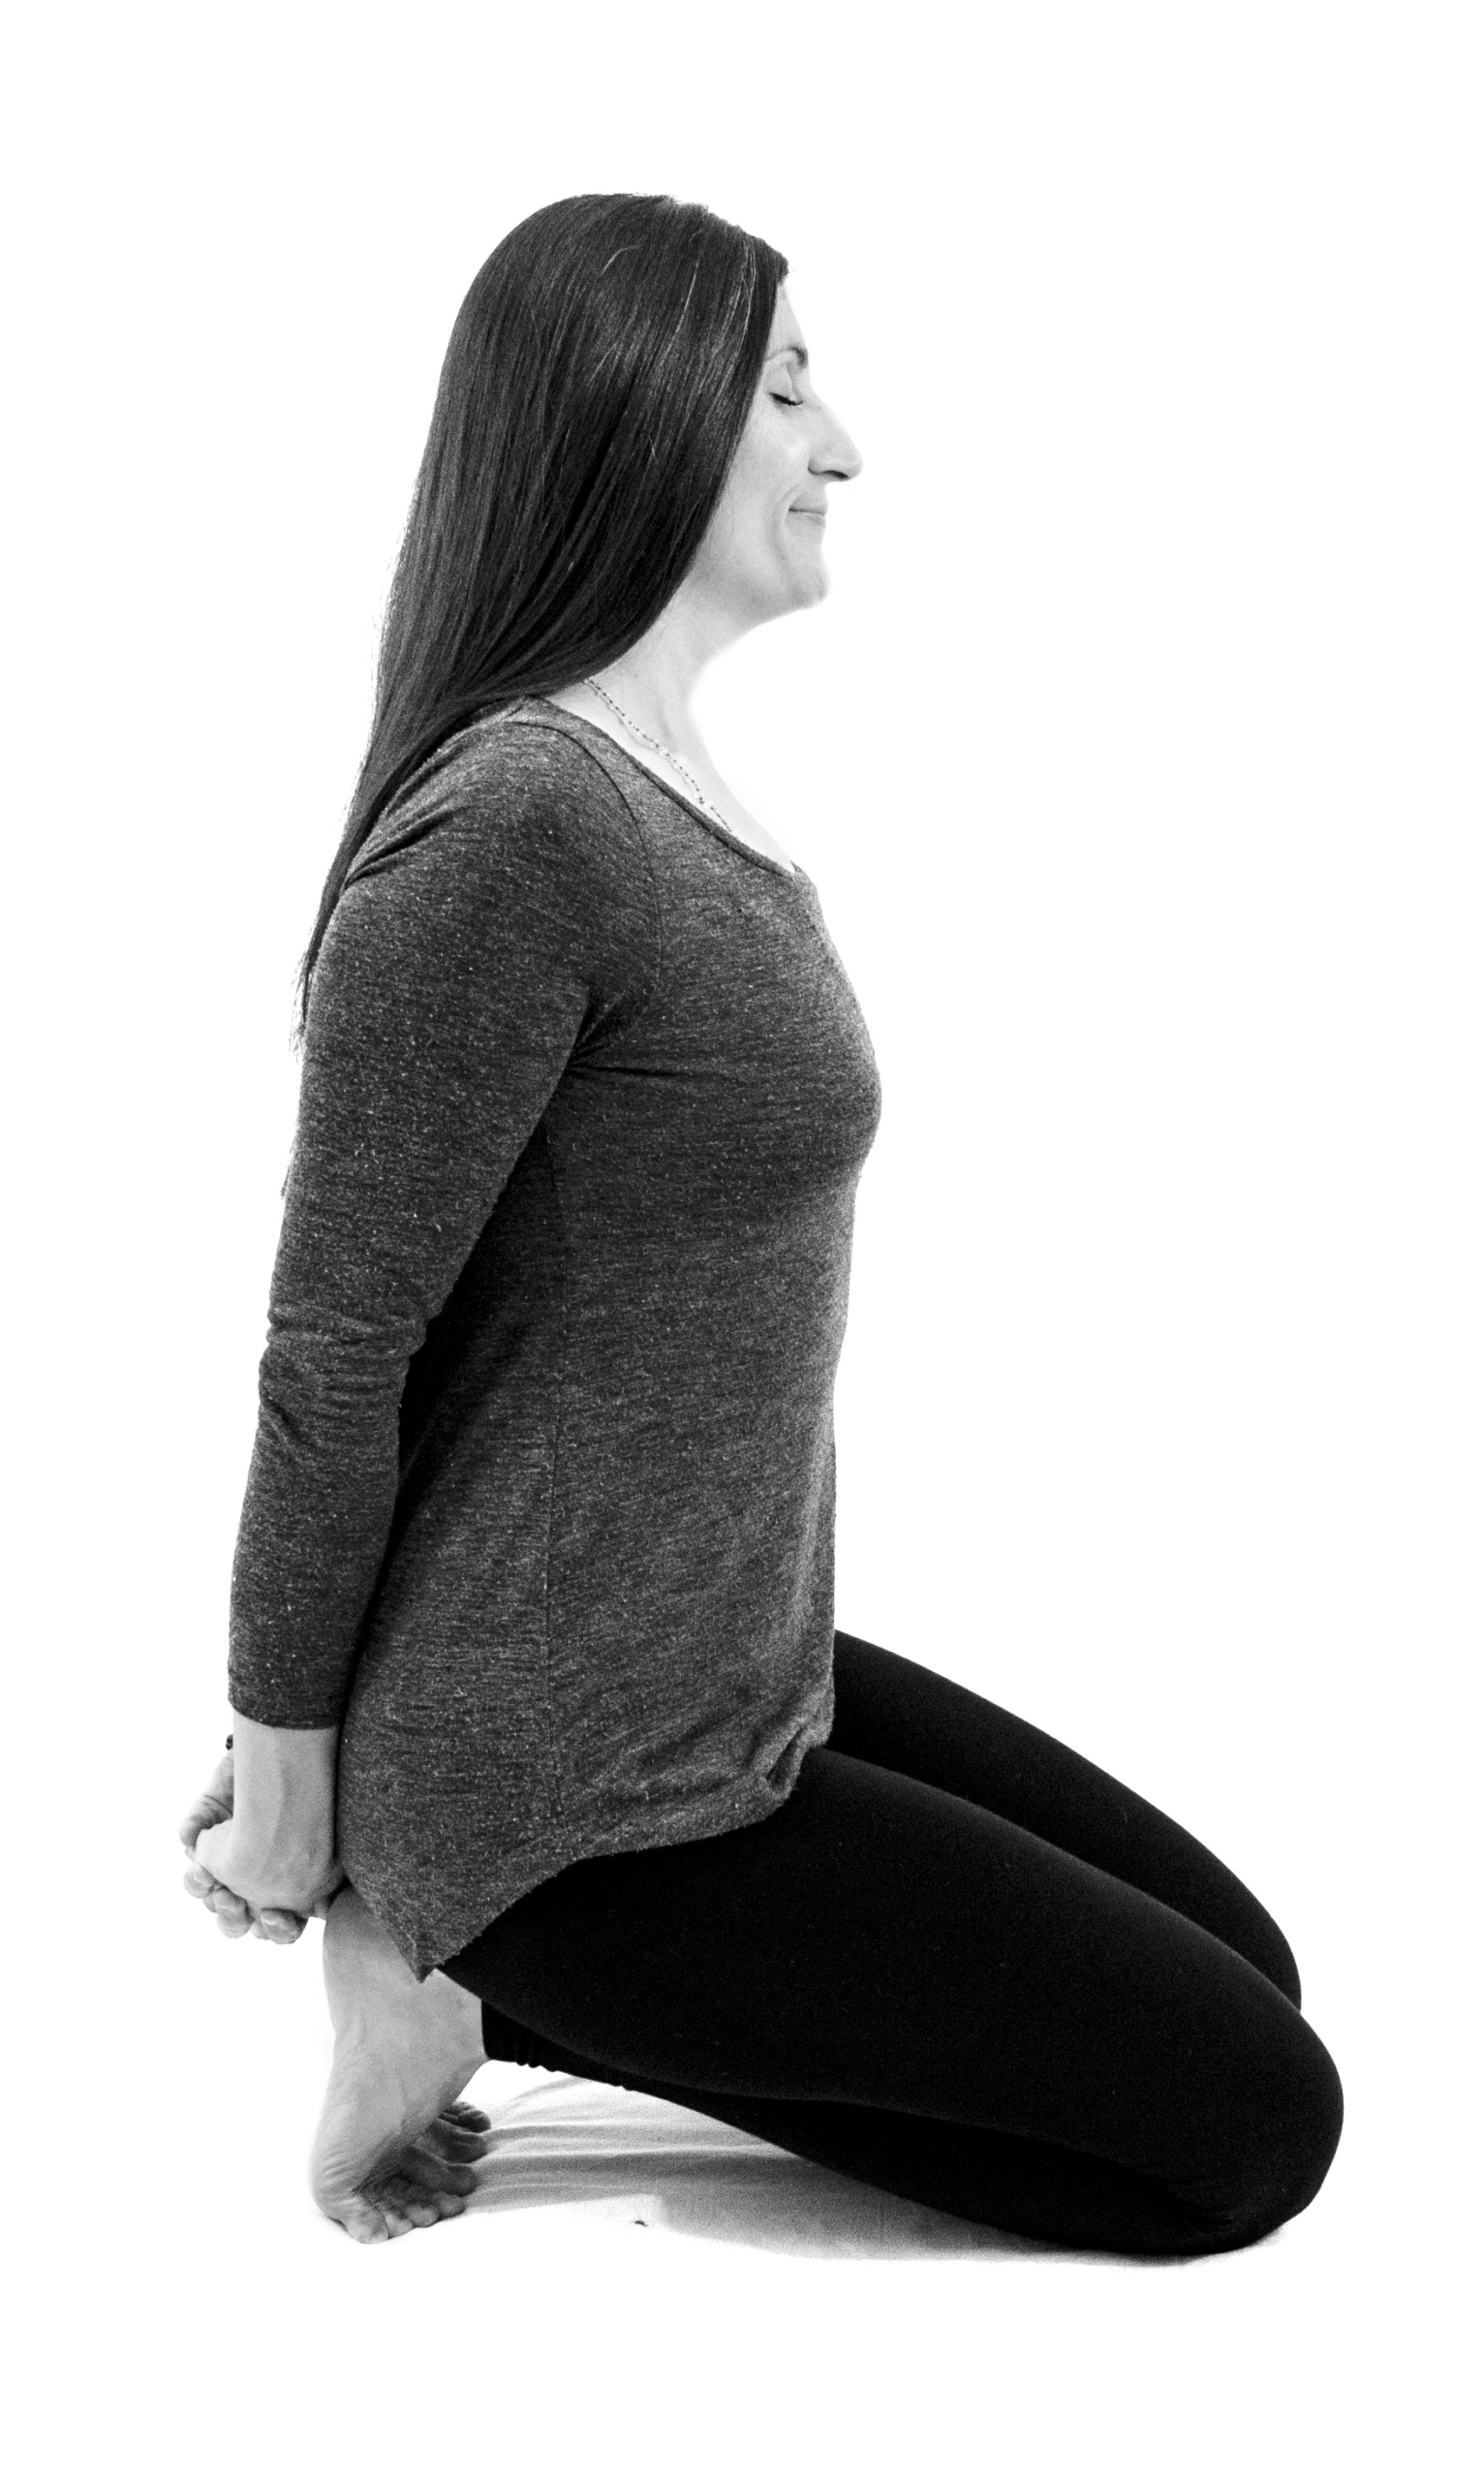
Interlace Chest and Shoulder Stretch, fingers interlaced with arms lengthened, toes tucked under
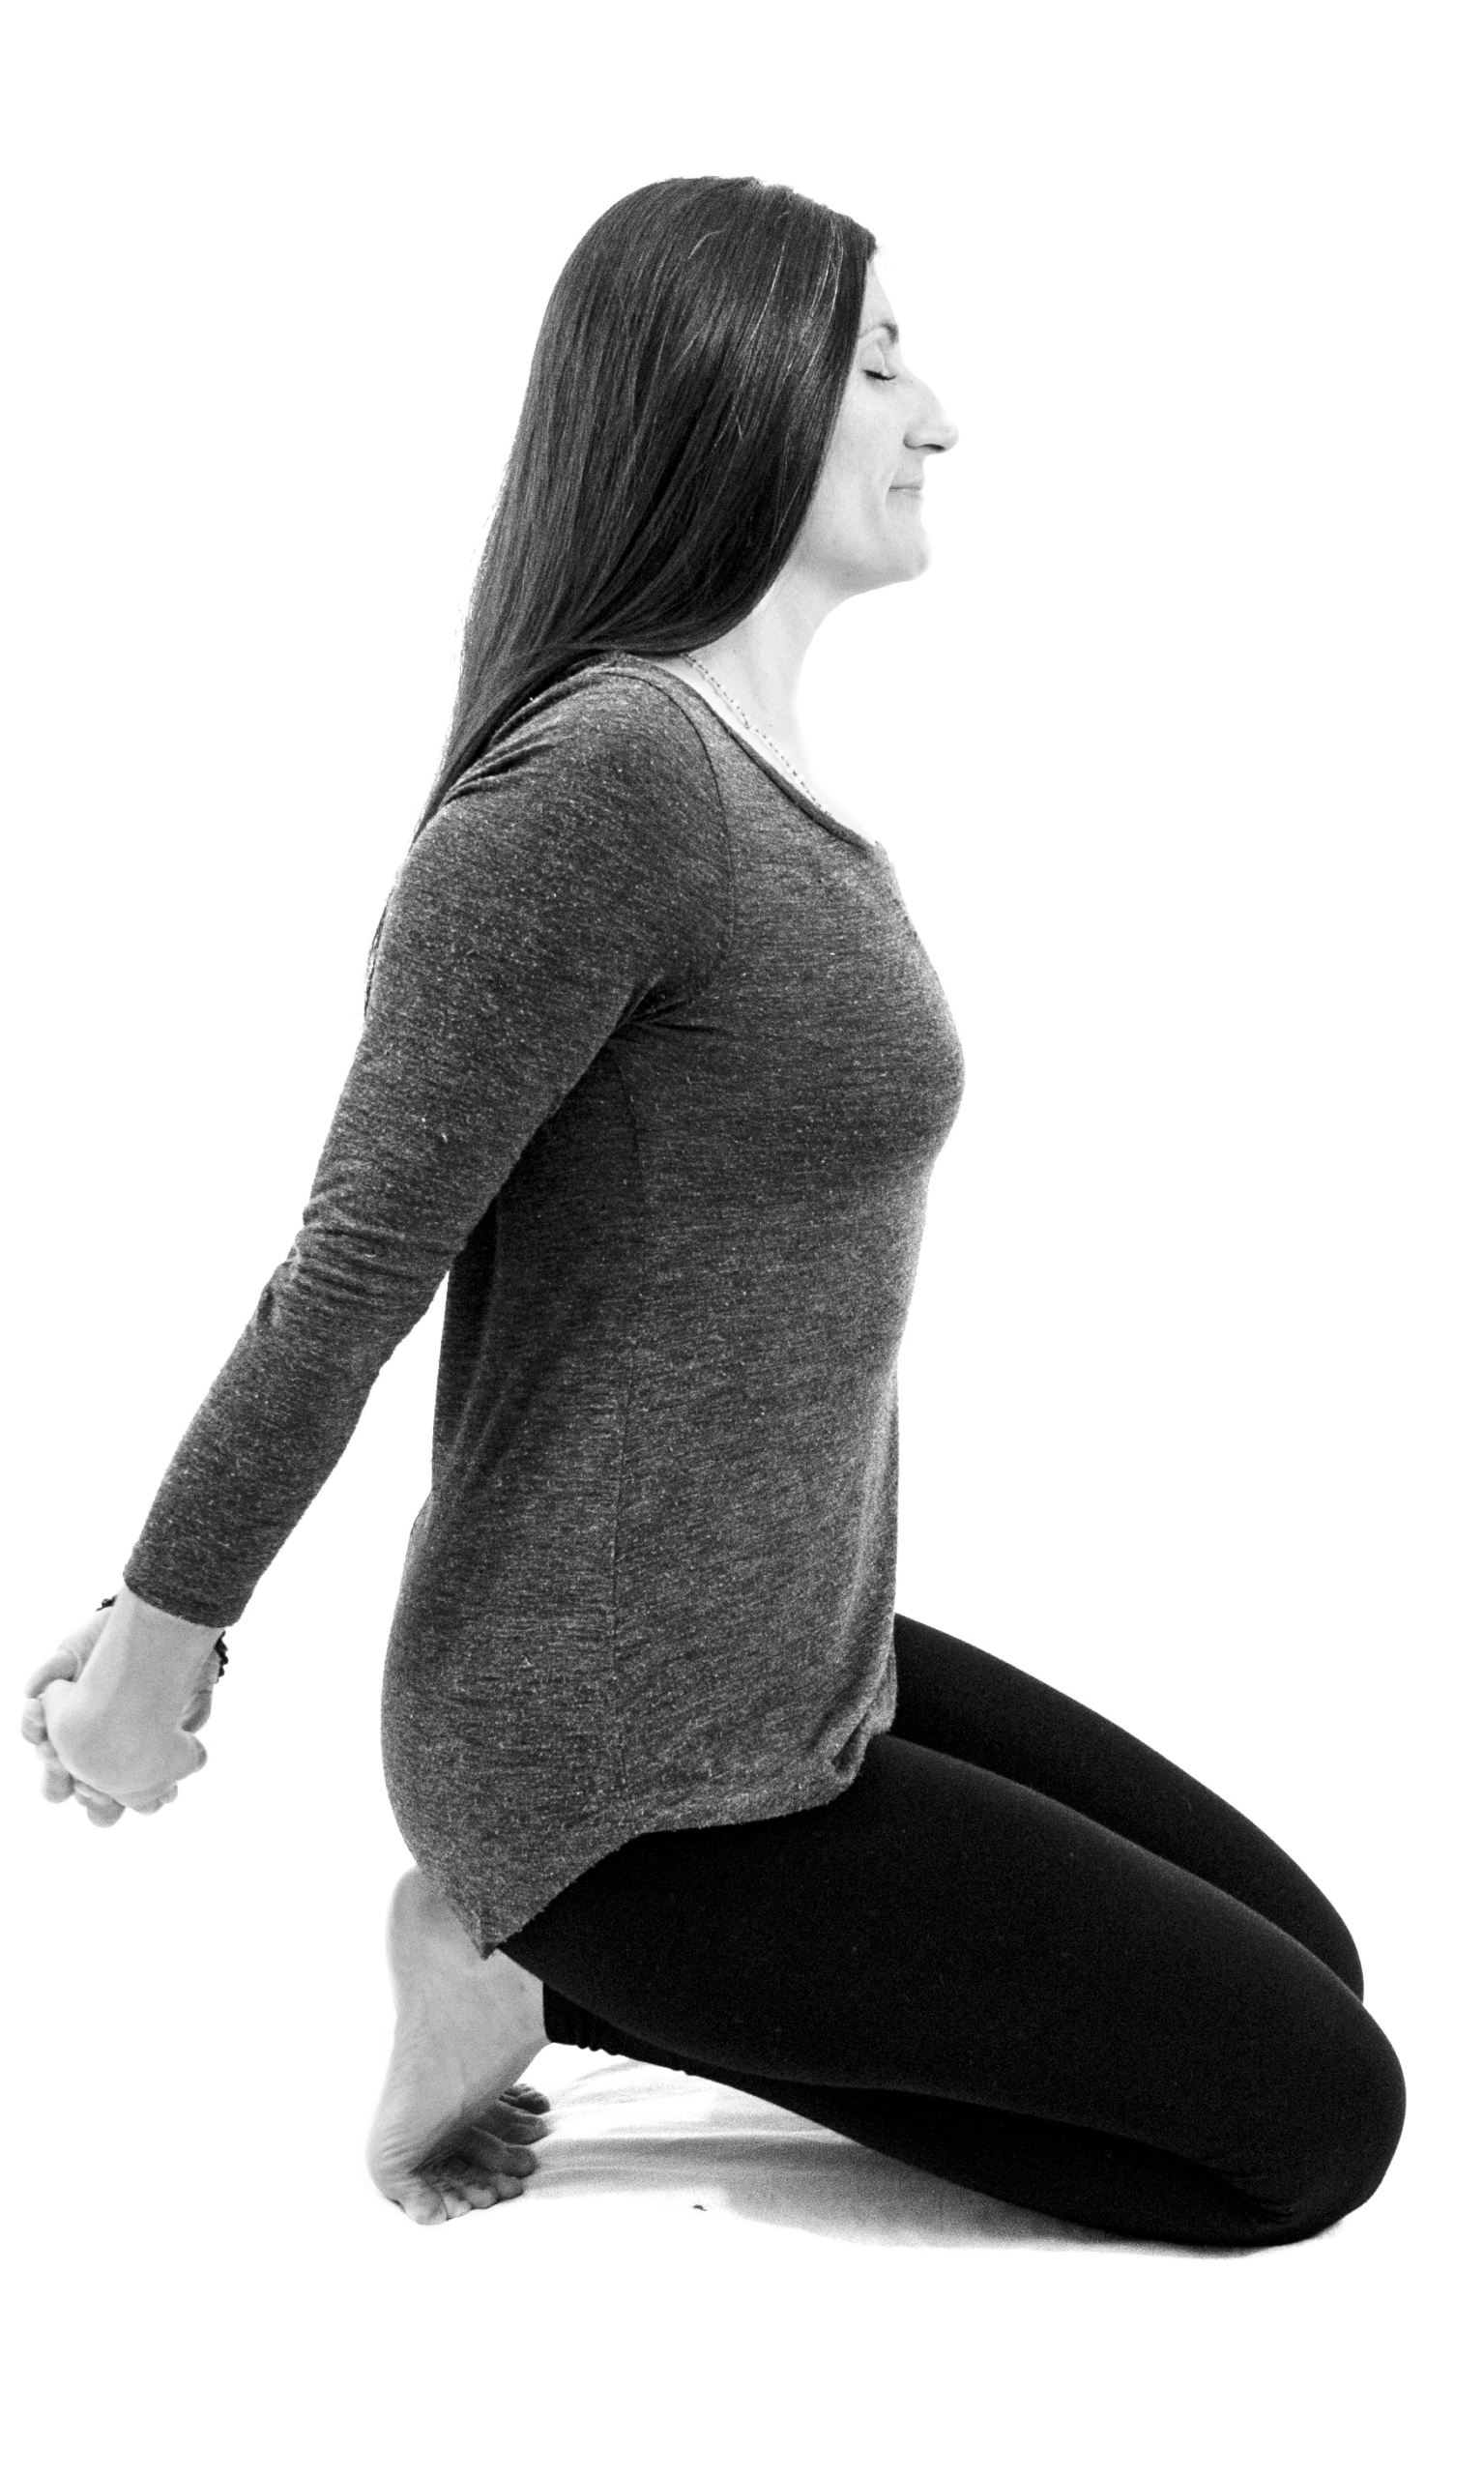
Interlace Chest and Shoulder Stretch, fingers interlaced with arms lengthened away from buttocks, toes tucked under
Carpal Stretches
These gentle stretches for the fingers and wrists help relieve Carpal Tunnel Syndrome, which commonly occurs when typing at a computer. As you practice, you may notice stretching in the elbows, shoulders or neck. Since everything is connected, this is an effective way to target and relieve built-up tension in those areas, as well as the wrists and fingers. Be gentle with yourself and notice where you are feeling the stretch.
Breathe deeply and practice daily, especially if you work at a computer or had issues with Carpal Tunnel previously.
Instruction
- Come into a comfortable seated posture either in a chair, cross-legged (sit on a blanket to get the hips higher than the knees to support the back) or kneel, sitting on the heels
- Inhale, lengthen the right arm out, palm up
- Exhale, grab the pinky finger and gently stretch it back, opening the joint
- Hold for a full cycle of breath and an inhale
- Exhale, release the pinky and grab hold of the ring finger and gently stretch it
- Hold for a full cycle of breath and an inhale
- Exhale, release the ring finger and switch to the middle finger
- Hold for a full cycle of breath and an inhale
- Exhale, release the middle finger and switch to the index finger
- Hold for a full cycle of breath and an inhale
- Exhale, release the index finger, grab the thumb and draw it down toward the wrist
- Hold for a full cycle of breath and an inhale
- Exhale and release the thumb
- Inhale, bend the arm, turn the palm out, facing away from the chest
- Exhale, draw the thumb into the palm making the number four with the fingers
- Inhale, press the thumb joint into the palm for a gentle assist and deeper stretch with the opposite hand
- Hold for a full cycle of breath and an inhale
- Exhale, release the thumb and make a fist with the hand
- Inhale, place the opposite hand over the fist and gently draw the fingers down toward the earth, stretching the top of the wrist
- Hold for a full cycle of breath and an inhale
- Exhale, release and circle the wrist for a few rotations
- Inhale, lengthen both arms out in front of you and stack the hands
- Exhale, turn the palms in towards each other, interlace the fingers, palm to palm
- Exhale, bend the arms and draw the fingers toward the chest, pulling the hands through the arms (the arms may not come all the way through)
- Soften the tongue and jaw and notice the stretch in the wrists, including any you feel in the elbows, shoulders or neck
- To transition: unwind the arms and release the interlace. Gently circle the wrists a few times and follow the instructions for the left side
- To release: unwind the arms and release the interlace. Gently circle the wrists a few times
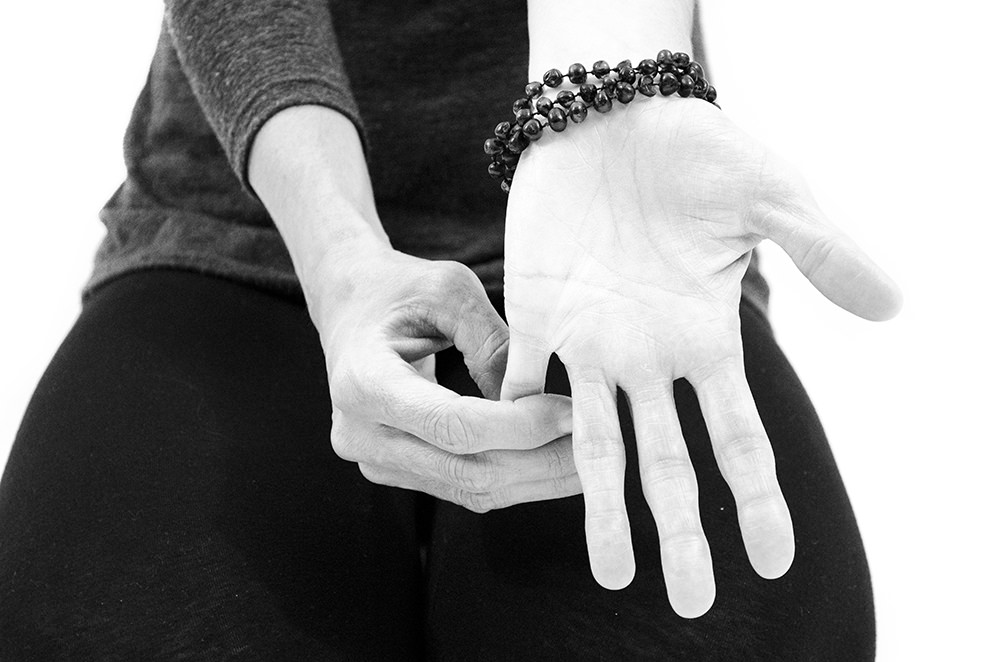
Carpal Stretches, draw pinky finger back
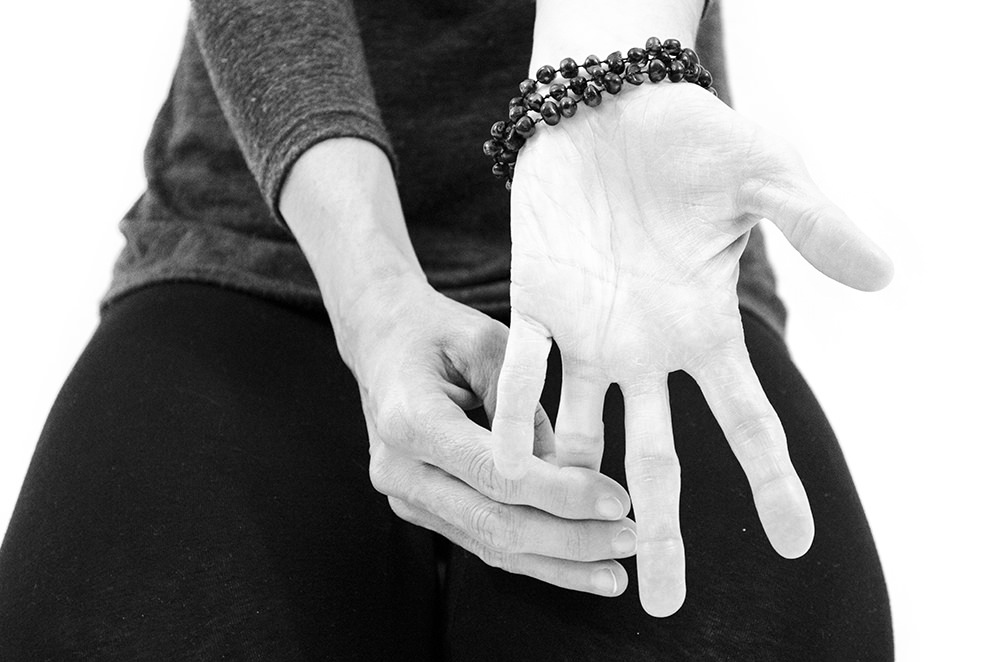
Carpal Stretches, draw ring finger back
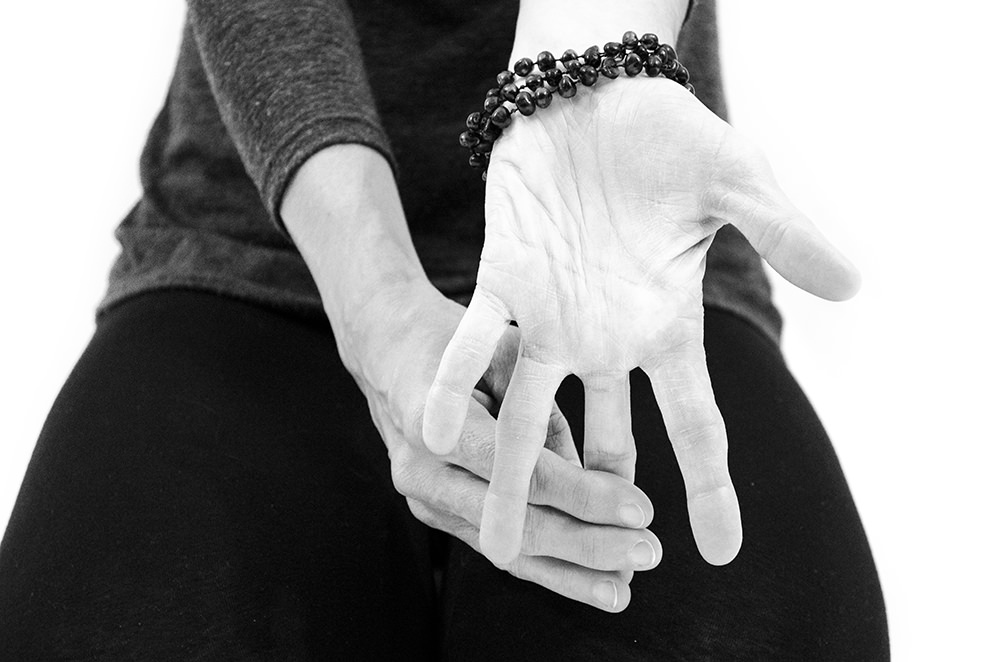
Carpal Stretches, draw middle finger back
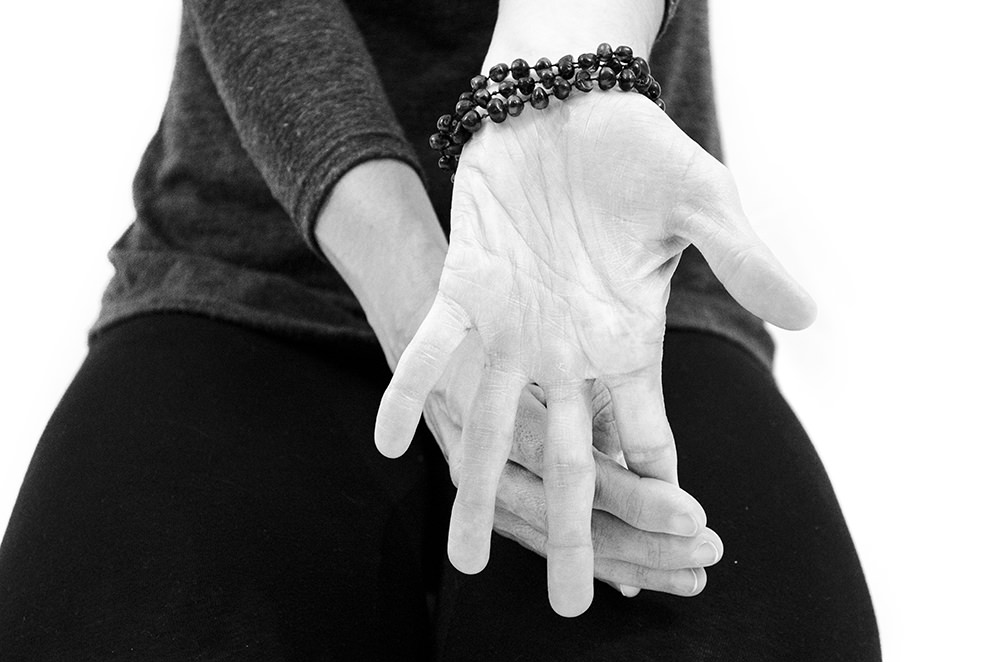
Carpal Stretches, draw index finger back
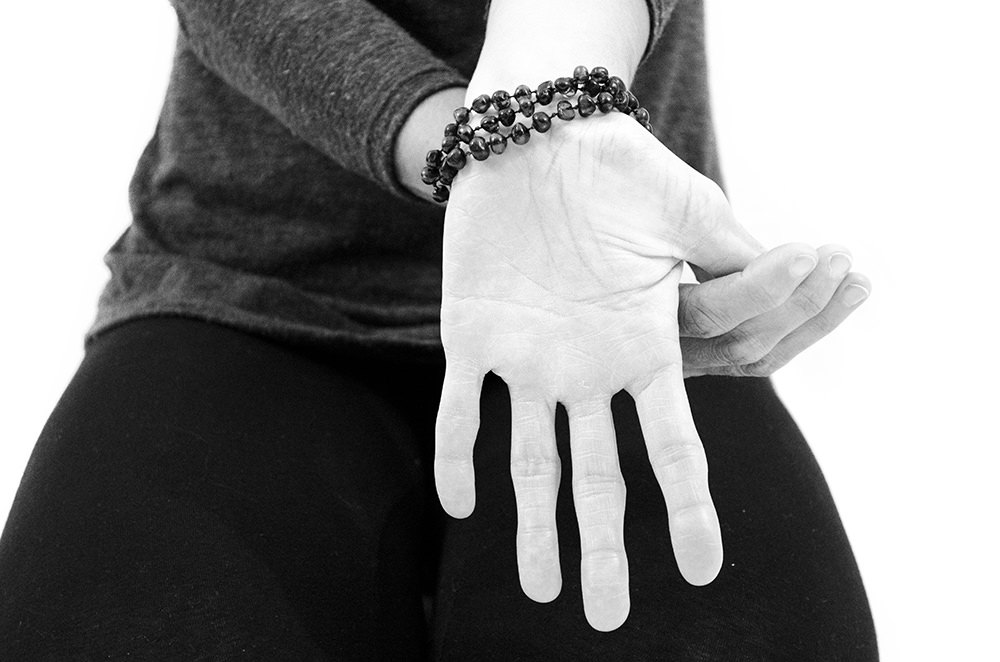
Carpal Stretches, draw thumb back
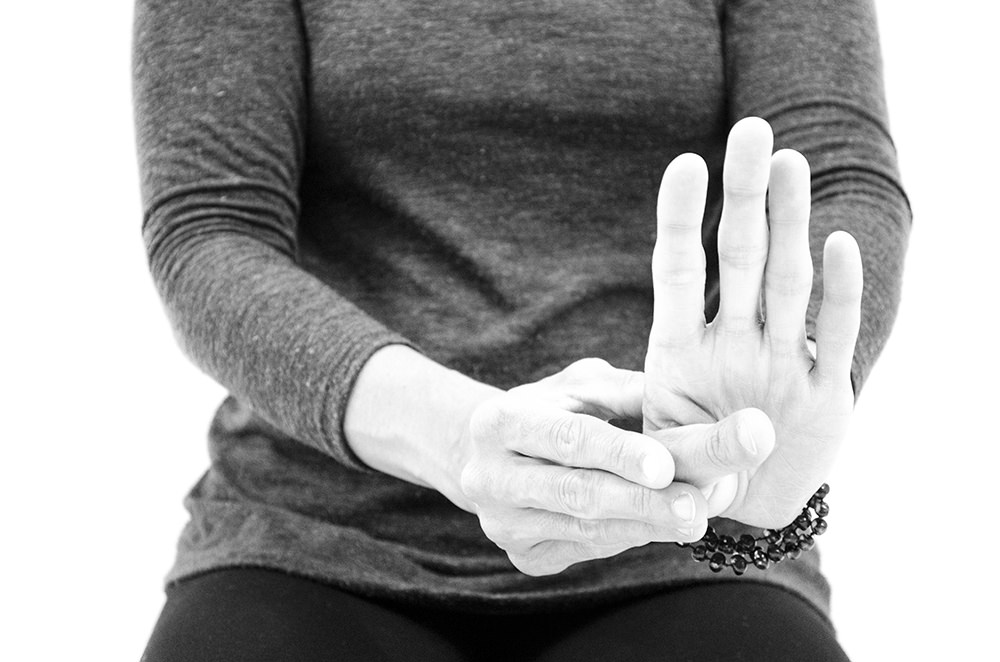
Carpal Stretches, palm out, thumb in
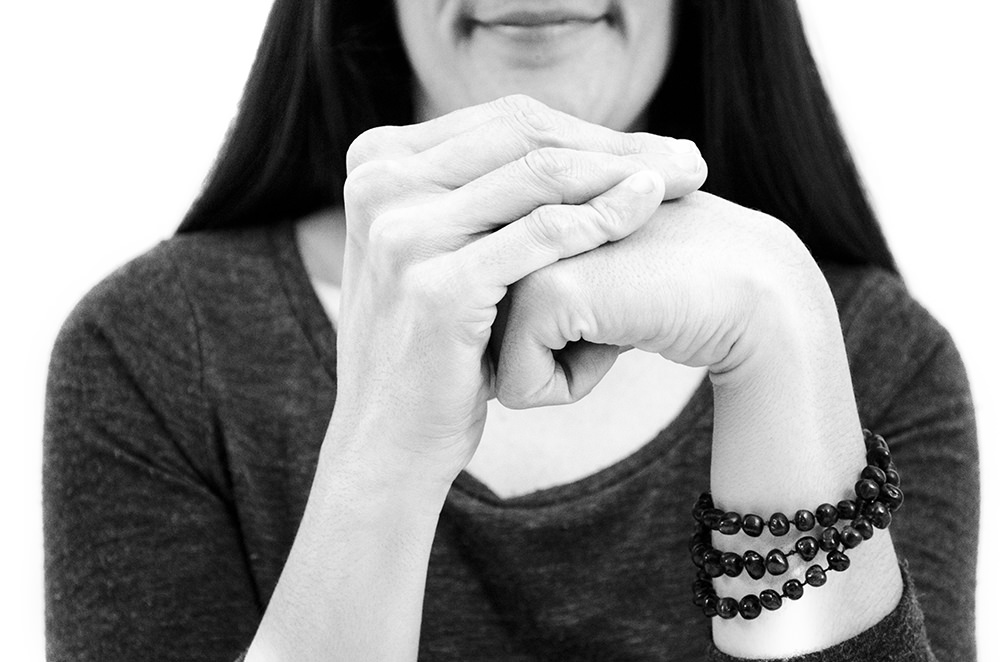
Carpal Stretches, draw fist down
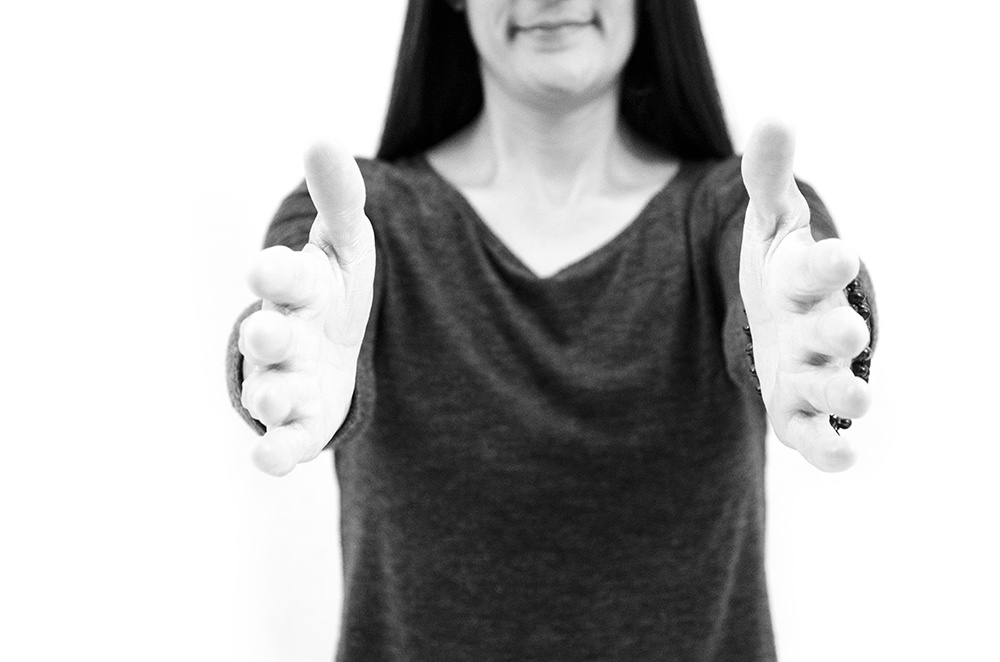
Carpal Stretches, Wrist Interlace, step one, arms out
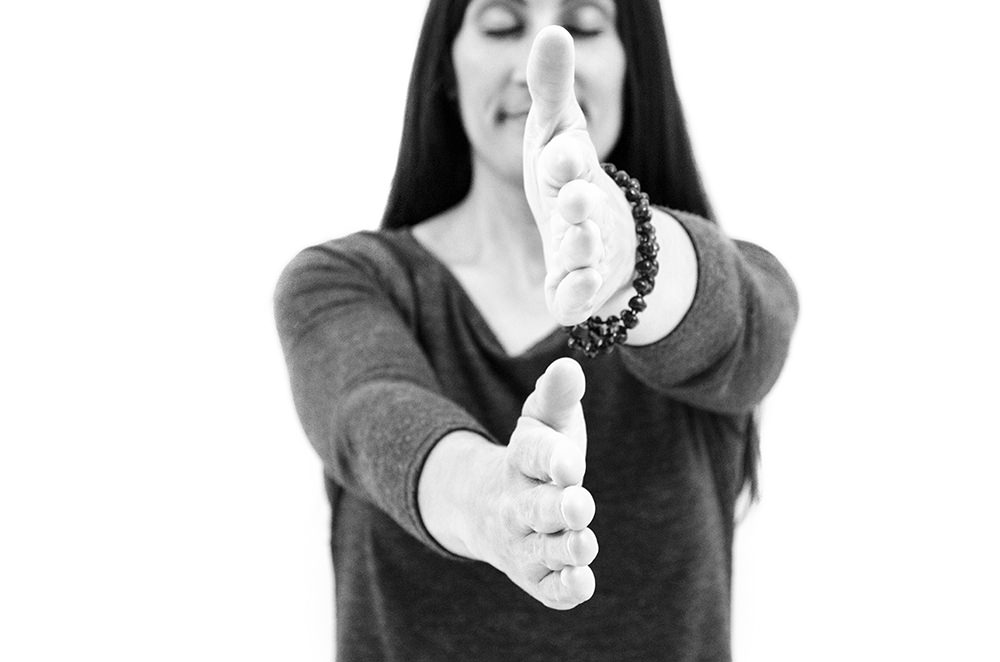
Carpal Stretches, Wrist Interlace, step two, stack hands
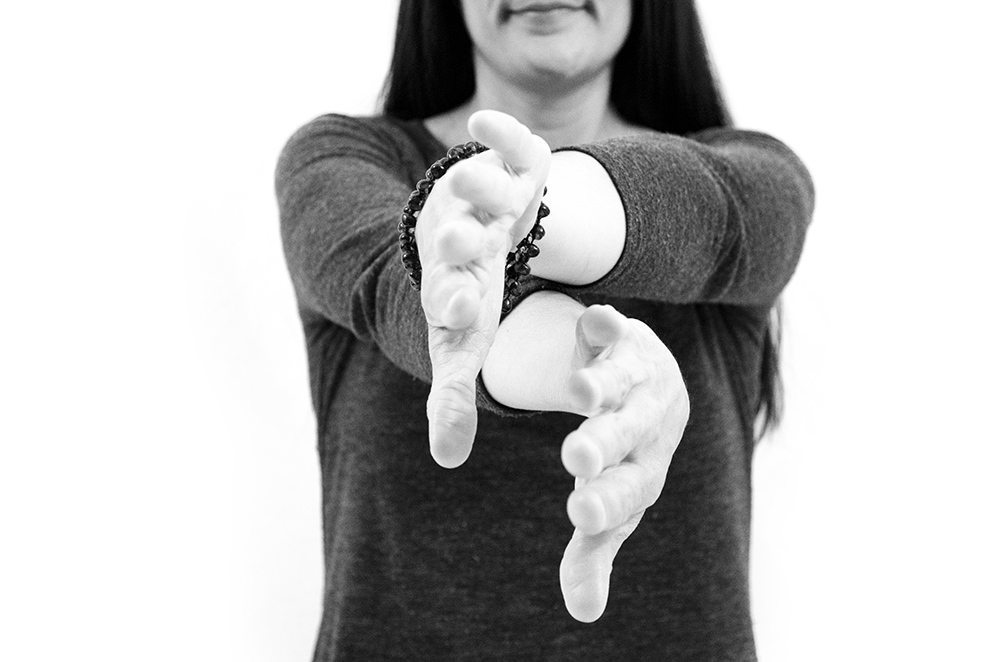
Carpal Stretches, Wrist Interlace, step three, turn palms toward each other
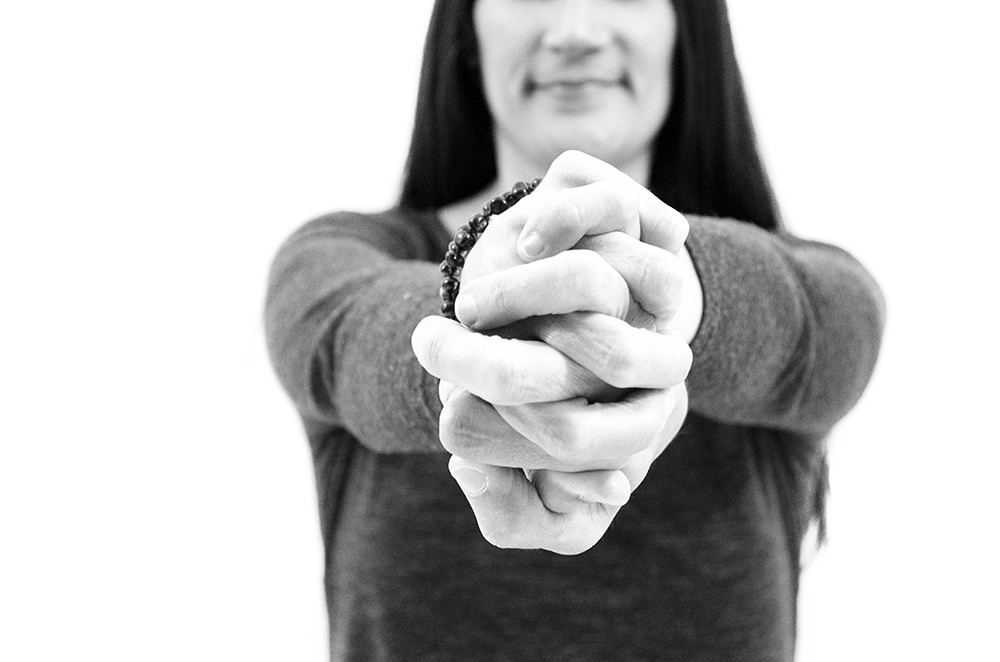
Carpal Stretches, Wrist Interlace, step two, stack hands
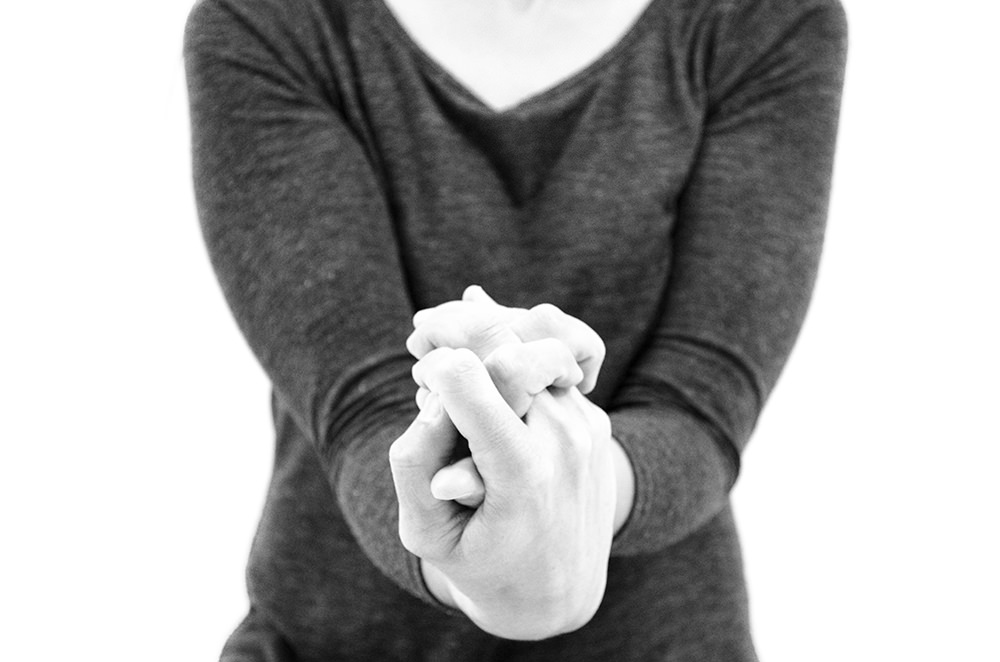
Carpal Stretches, Wrist Interlace, step five, draw hands through arm
Seated Butterfly with Shoulder Stretches and Side Bend
This seated hip opener is one of my favorites. It’s an easy way to open the inner thigh and hips. While practicing in this position, we use the help of gravity to release holding and stress in the legs and hips for a deep stretch. Even if we sit without folding forward, we still receive the benefits of this hip opener, which includes stimulation to the abdominal organs, high blood pressure and anxiety.
Be mindful of how far forward you are folding to avoid over stretching. Sit up on a blanket or pillow to prevent the spine from rounding back—having a straight spine is a must when practicing this pose. The optimal stretch comes when we hinge the hips forward after the sacrum is in proper alignment, not by rounding the spine and using the neck or shoulders to fold deeper.
I’ve added in two of my favorite shoulder stretches and a side bend to practice while seated in Butterfly, which makes this a combination of stretches for both major joints of the hips and shoulders. These shoulder stretches and side bend create expansion in the ribs and shoulders and flexibility in the joints.
There is an instinct to curl and round while sitting at a computer or on a mobile phone, and this can wreak havoc on the mid and upper back. I encourage you to keep coming back to these shoulder stretches and side bend to maintain joint health and ease built-up tension. Practice a Supported Twist or Seated Knee Flop Twist after this posture for even more relief in the mid and upper back.
Instruction
- Come into a seated position, sitting up on a blanket support, lengthening the legs out in front of you
- Reach back and draw the buttocks flesh back as you rock the pelvis forward
- Bend the legs, reach for the feet and draw the soles of the feet together, forming a diamond shape with the legs
- For more stretch: draw the heels in close to the groin
- For less stretch: widen the distance between the heels and groin
- Hold onto the feet or the ankles as you lengthen the spine up toward sky, stacking each vertebra on top of each other, from tailbone to crown of the head, chin parallel with the earth
- Inhale, lift the sternum
- Exhale, hinge the hips forward coming into your forward fold
- If there are any low back or disk issues, or you want the maximum stretch, keep a straight spine, lengthening out through the crown of the head. If you are looking for a softer fold, round the back and shoulders, releasing the neck
- Be sure to soften the jaw and tongue
- Allow the stretch to unfold and deepen with each breath without forcing the legs to the earth
- For added support, place blankets, blocks or pillows under the knees or transition into Supported Resting Butterfly
- Avoid bouncing the knees or putting additional weight on the legs
- Suggested hold 10-20 cycles of breath
- Transition to the following shoulder stretches or release by lengthening the legs

Seated Butterfly
½ Archer
Instruction
- From Seated Butterfly with a straight spine (release the fold if you were practicing one)
- Inhale, lengthen both arms toward sky
- Exhale, bend the right arm and place the right hand between the shoulder blades
- Inhale, place the left hand on the right elbow
- Exhale, lightly guide the right elbow down and in with the left hand
- Suggested hold 5-10 breaths
- Transition to the next shoulder stretch or practice the stretch on the other side
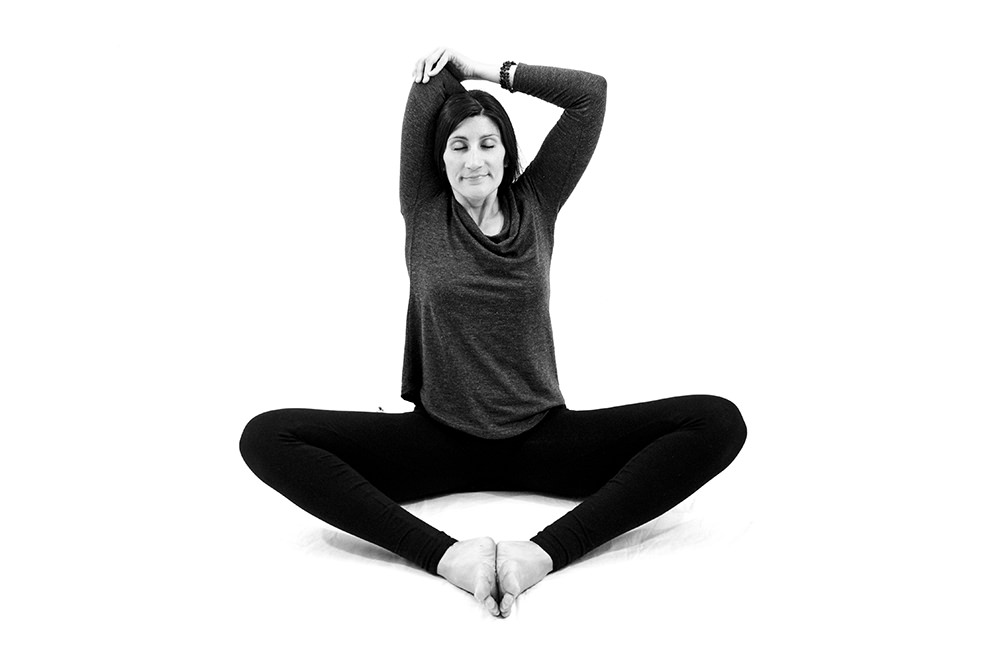
Seated Butterfly, ½ Archer
Seated Butterfly, ½ Archer Side Bends
Instruction
- From Seated Butterfly with ½ Archer on the right side
- Inhale, lift the sternum
- Exhale, bend toward the left, coming into a Side Bend
- Soften the shoulders down away from the ears
- Soften the jaw and tongue
- Keep lifting the sternum and roll the chest open; roll the left side of the heart up toward sky
- Breathe into the side body for 10-20 breaths
- Transition to the next shoulder stretch or practice the stretch on the other side
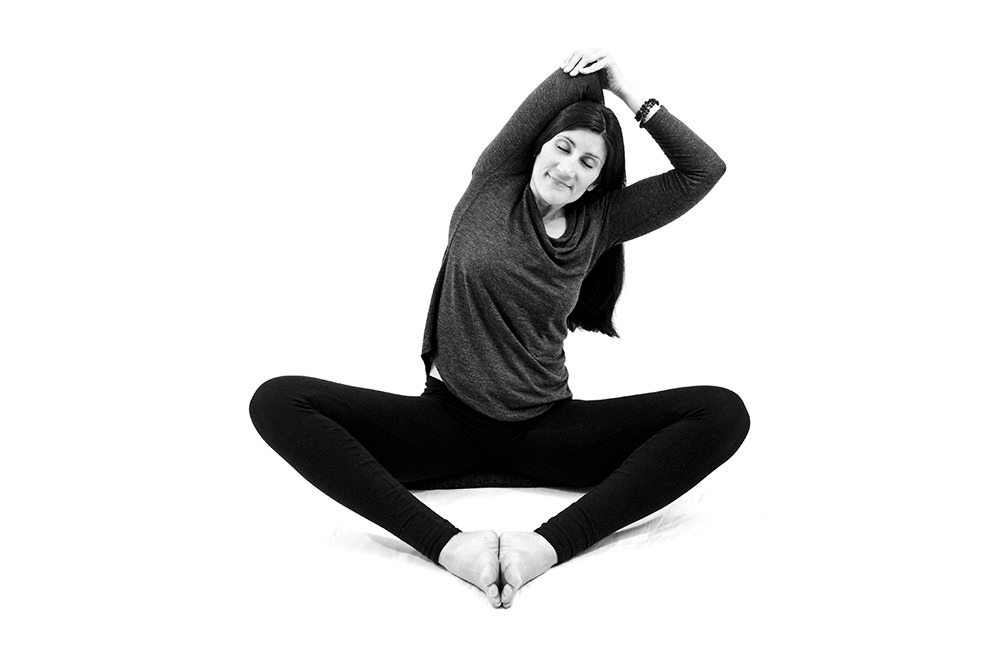
Seated Butterfly, ½ Archer Side Bends
My book: Yoga For Low Back and Hip Health
This content is from my book, “Yoga For Low Back and Hip Health.” In it, you’ll find easy gentle and restorative yoga instruction that anyone can do. You’ll be feeling better in no time, without drugs or surgery. No experience needed: it’s perfect for beginners and advanced yogis alike.
What’s in the book?
- Over 200 pages of in-depth and appropriate instruction
43 restorative and gentle yoga poses - 15 practical and unique yoga sequences. Practice at your convenience—no pressure to get to a packed studio class at an inconvenient time!
- Includes over 300 high-resolution images to help you along
Learn more about “Yoga For Low Back and Hip Health”


